Changelog

Follow new updates and improvements to Growably.

Filter HubSpot Records Before You Import

Overview

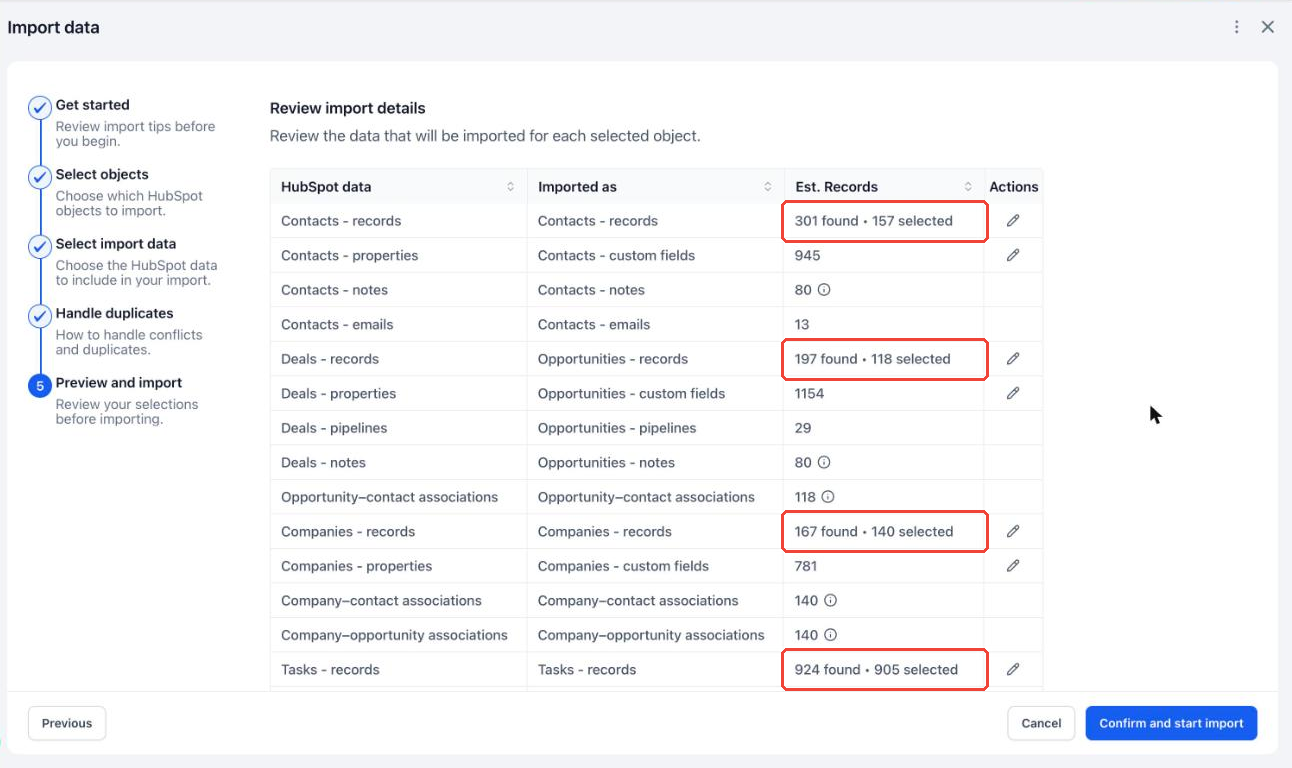
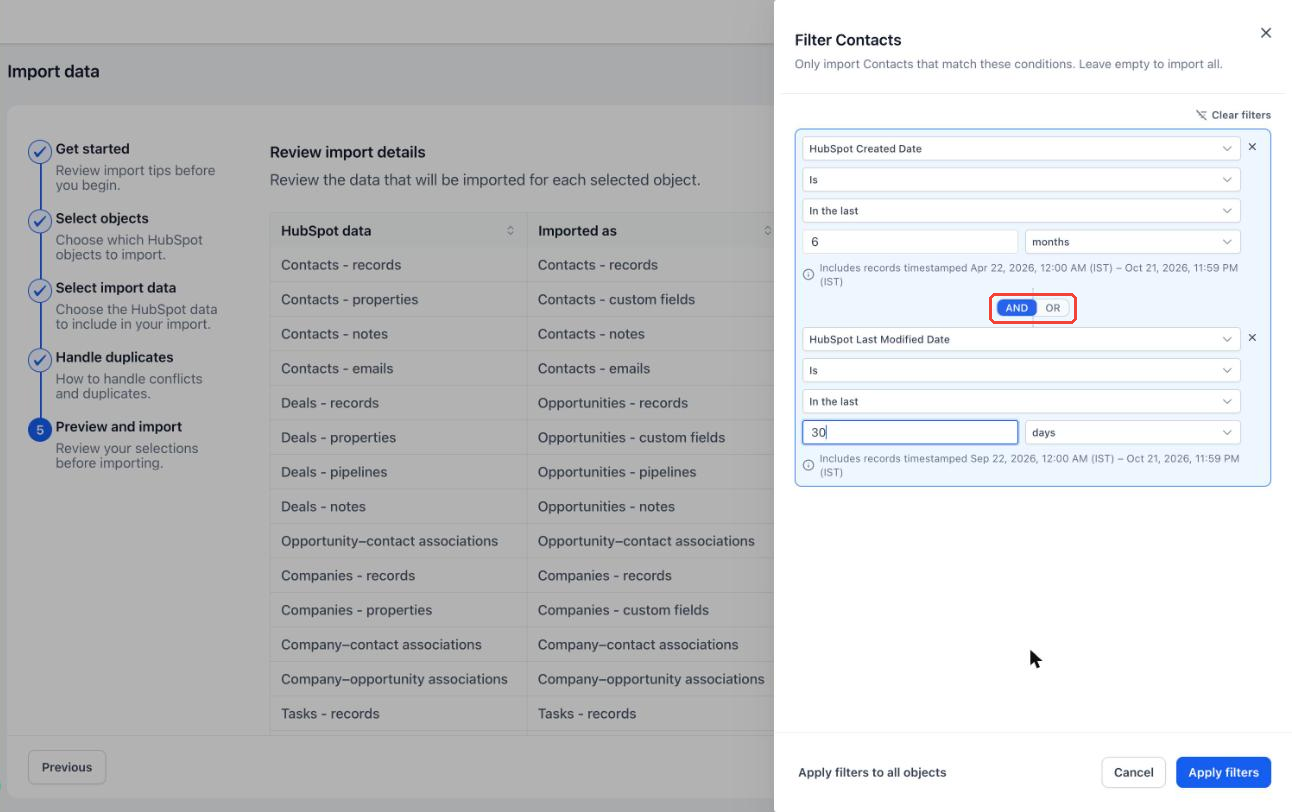
You can now choose exactly which HubSpot records come into HighLevel. The HubSpot Importer's Preview step lets you filter Contacts, Deals, Companies, and Tasks by when they were created or last modified in HubSpot, so you bring over the data you need and leave the rest behind.
image

What's New

  • Filter each object (Contacts, Deals, Companies, Tasks) separately on the Preview and import step

  • Filter by HubSpot Created Date or HubSpot Last Modified Date

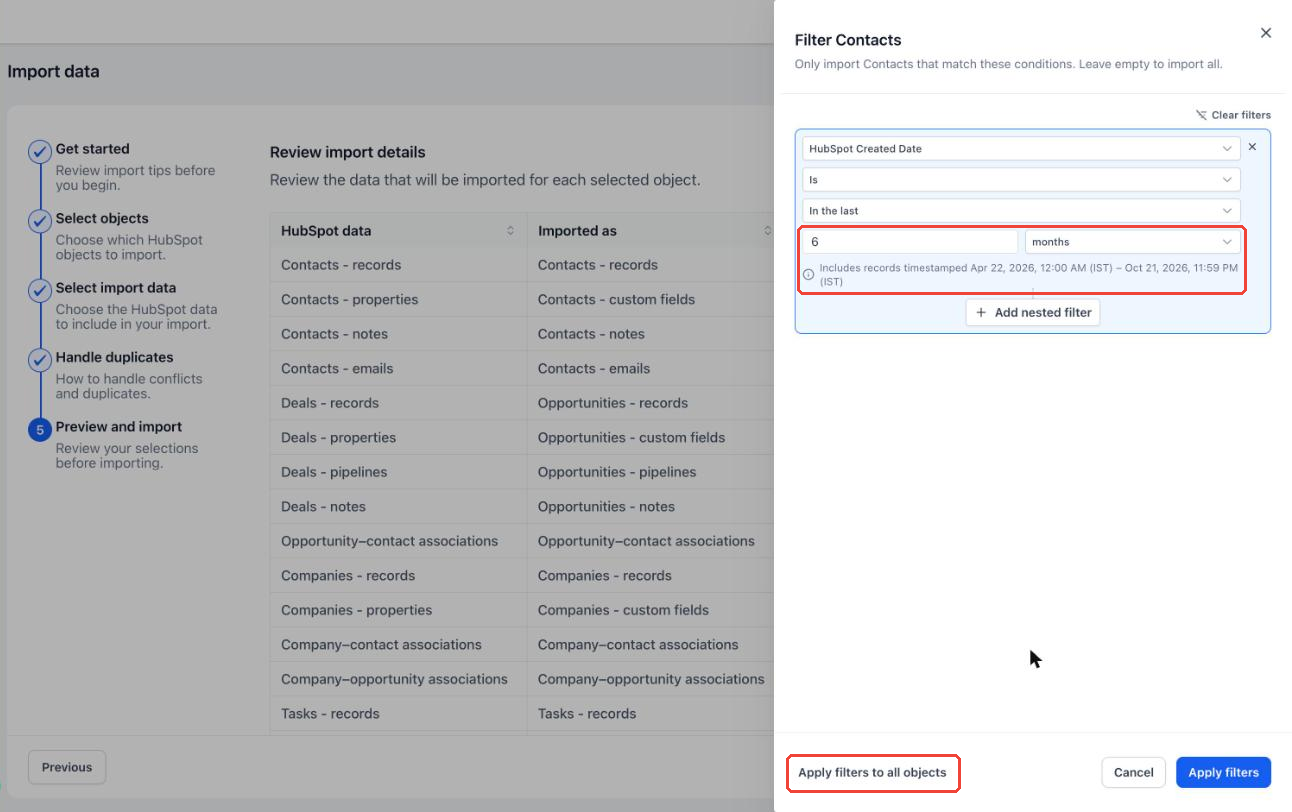
  • Choose relative ranges like In the last 6 months or This quarter, or exact dates with On, Before, After, and Between

  • See the exact date range a filter covers before you apply it

  • Combine conditions with AND / OR

  • Apply the same filters to every selected object in one click

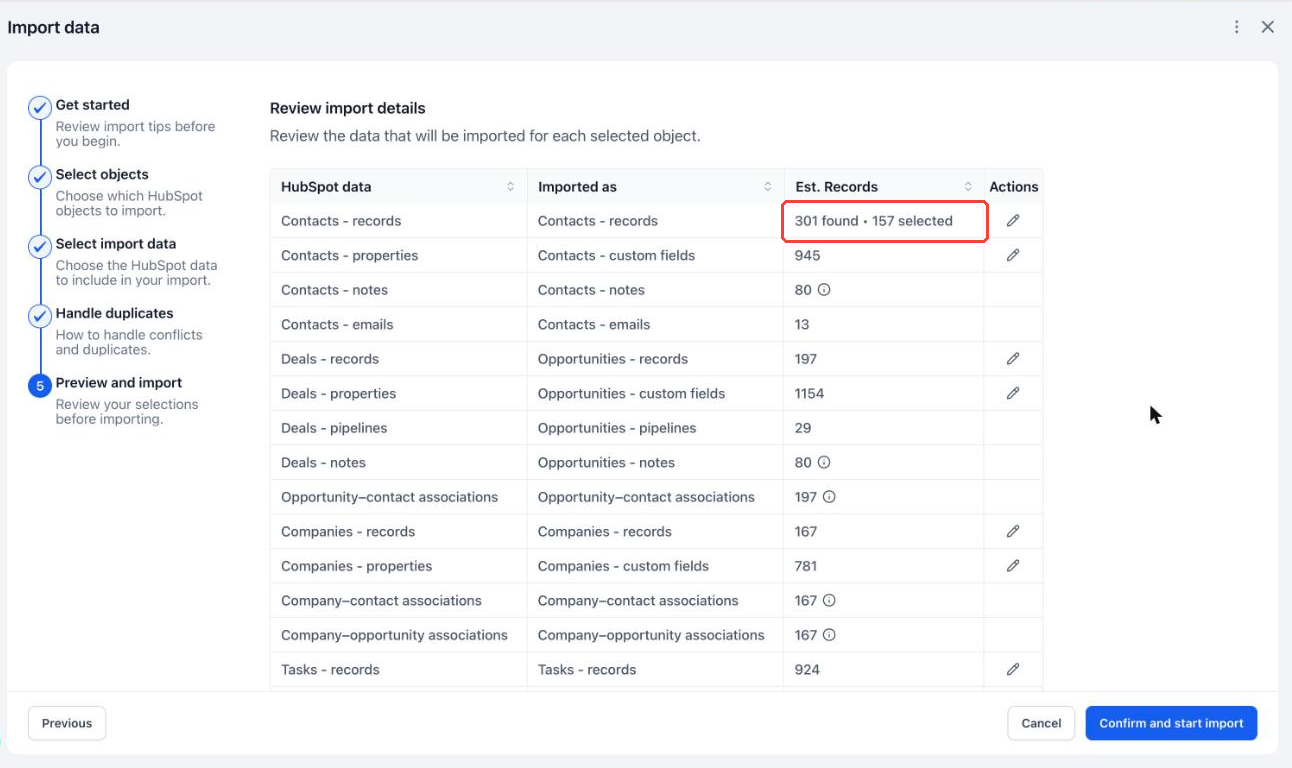
  • Record counts update right away, showing how many records were found and how many will be imported
image

How It Works

  • Go to Contacts, Companies, or Opportunities, click Import, and choose Import from HubSpot.

  • Continue through the wizard to Preview and import.

  • Click the edit (pencil) icon on any records row, such as Contacts – records.

  • Pick a field, a condition, and a value. Use Add nested filter to combine conditions with AND or OR.

  • Click Apply filters, or Apply filters to all objects to reuse the same conditions everywhere.

  • Review the updated counts and click Confirm and start import.
image
image

Benefits

  • Migrate only recent or active records

  • Smaller, faster imports that are easier to review

  • Fewer unwanted records to clean up afterward

  • Know exactly how many records will be imported before you start

Notes

Filters are optional. Leave them empty to import everything.

"In the last" excludes today.

Filters currently support HubSpot Created Date and HubSpot Last Modified Date.
ImprovedCRM

Improved A2P Rejection Guidance for Chat Widget and Manual Campaigns

We've rewritten the guidance in the "View required fixes" modal so it matches how you registered your campaign.

What's new:

  • Guidance for your setup: the most common rejection reasons now have separate guidance for campaigns set up through the Chat Widget (Quick Setup) and through Manual Setup, since the fix is in a different place for each.

  • Clearer next steps: each reason explains in plain language what happened, then lists the specific actions to take.

  • Know when it's not on you: some rejections are caused by something the platform generates, like the chat widget's consent wording. We'll tell you and point you to support, so you don't spend a resubmission on something you can't change.

  • Exact wording where carriers require it: for reasons like privacy policy verification, the steps include the required statement.

  • Notice when resubmitting won't help: for reasons like a business type mismatch, we'll tell you what needs to change first.

Previously:

The modal showed the carrier's generic guidance, written for every registration method. Chat Widget users were often asked to fix fields or consent wording they never wrote.

Why it matters:

Guidance that matches your setup helps you fix the right thing the first time and resubmit with confidence, without waiting on support.

ImprovedChat

Lead Source Report - Drill into Your Leads and See Value by Status

πŸ‘€

What's New?

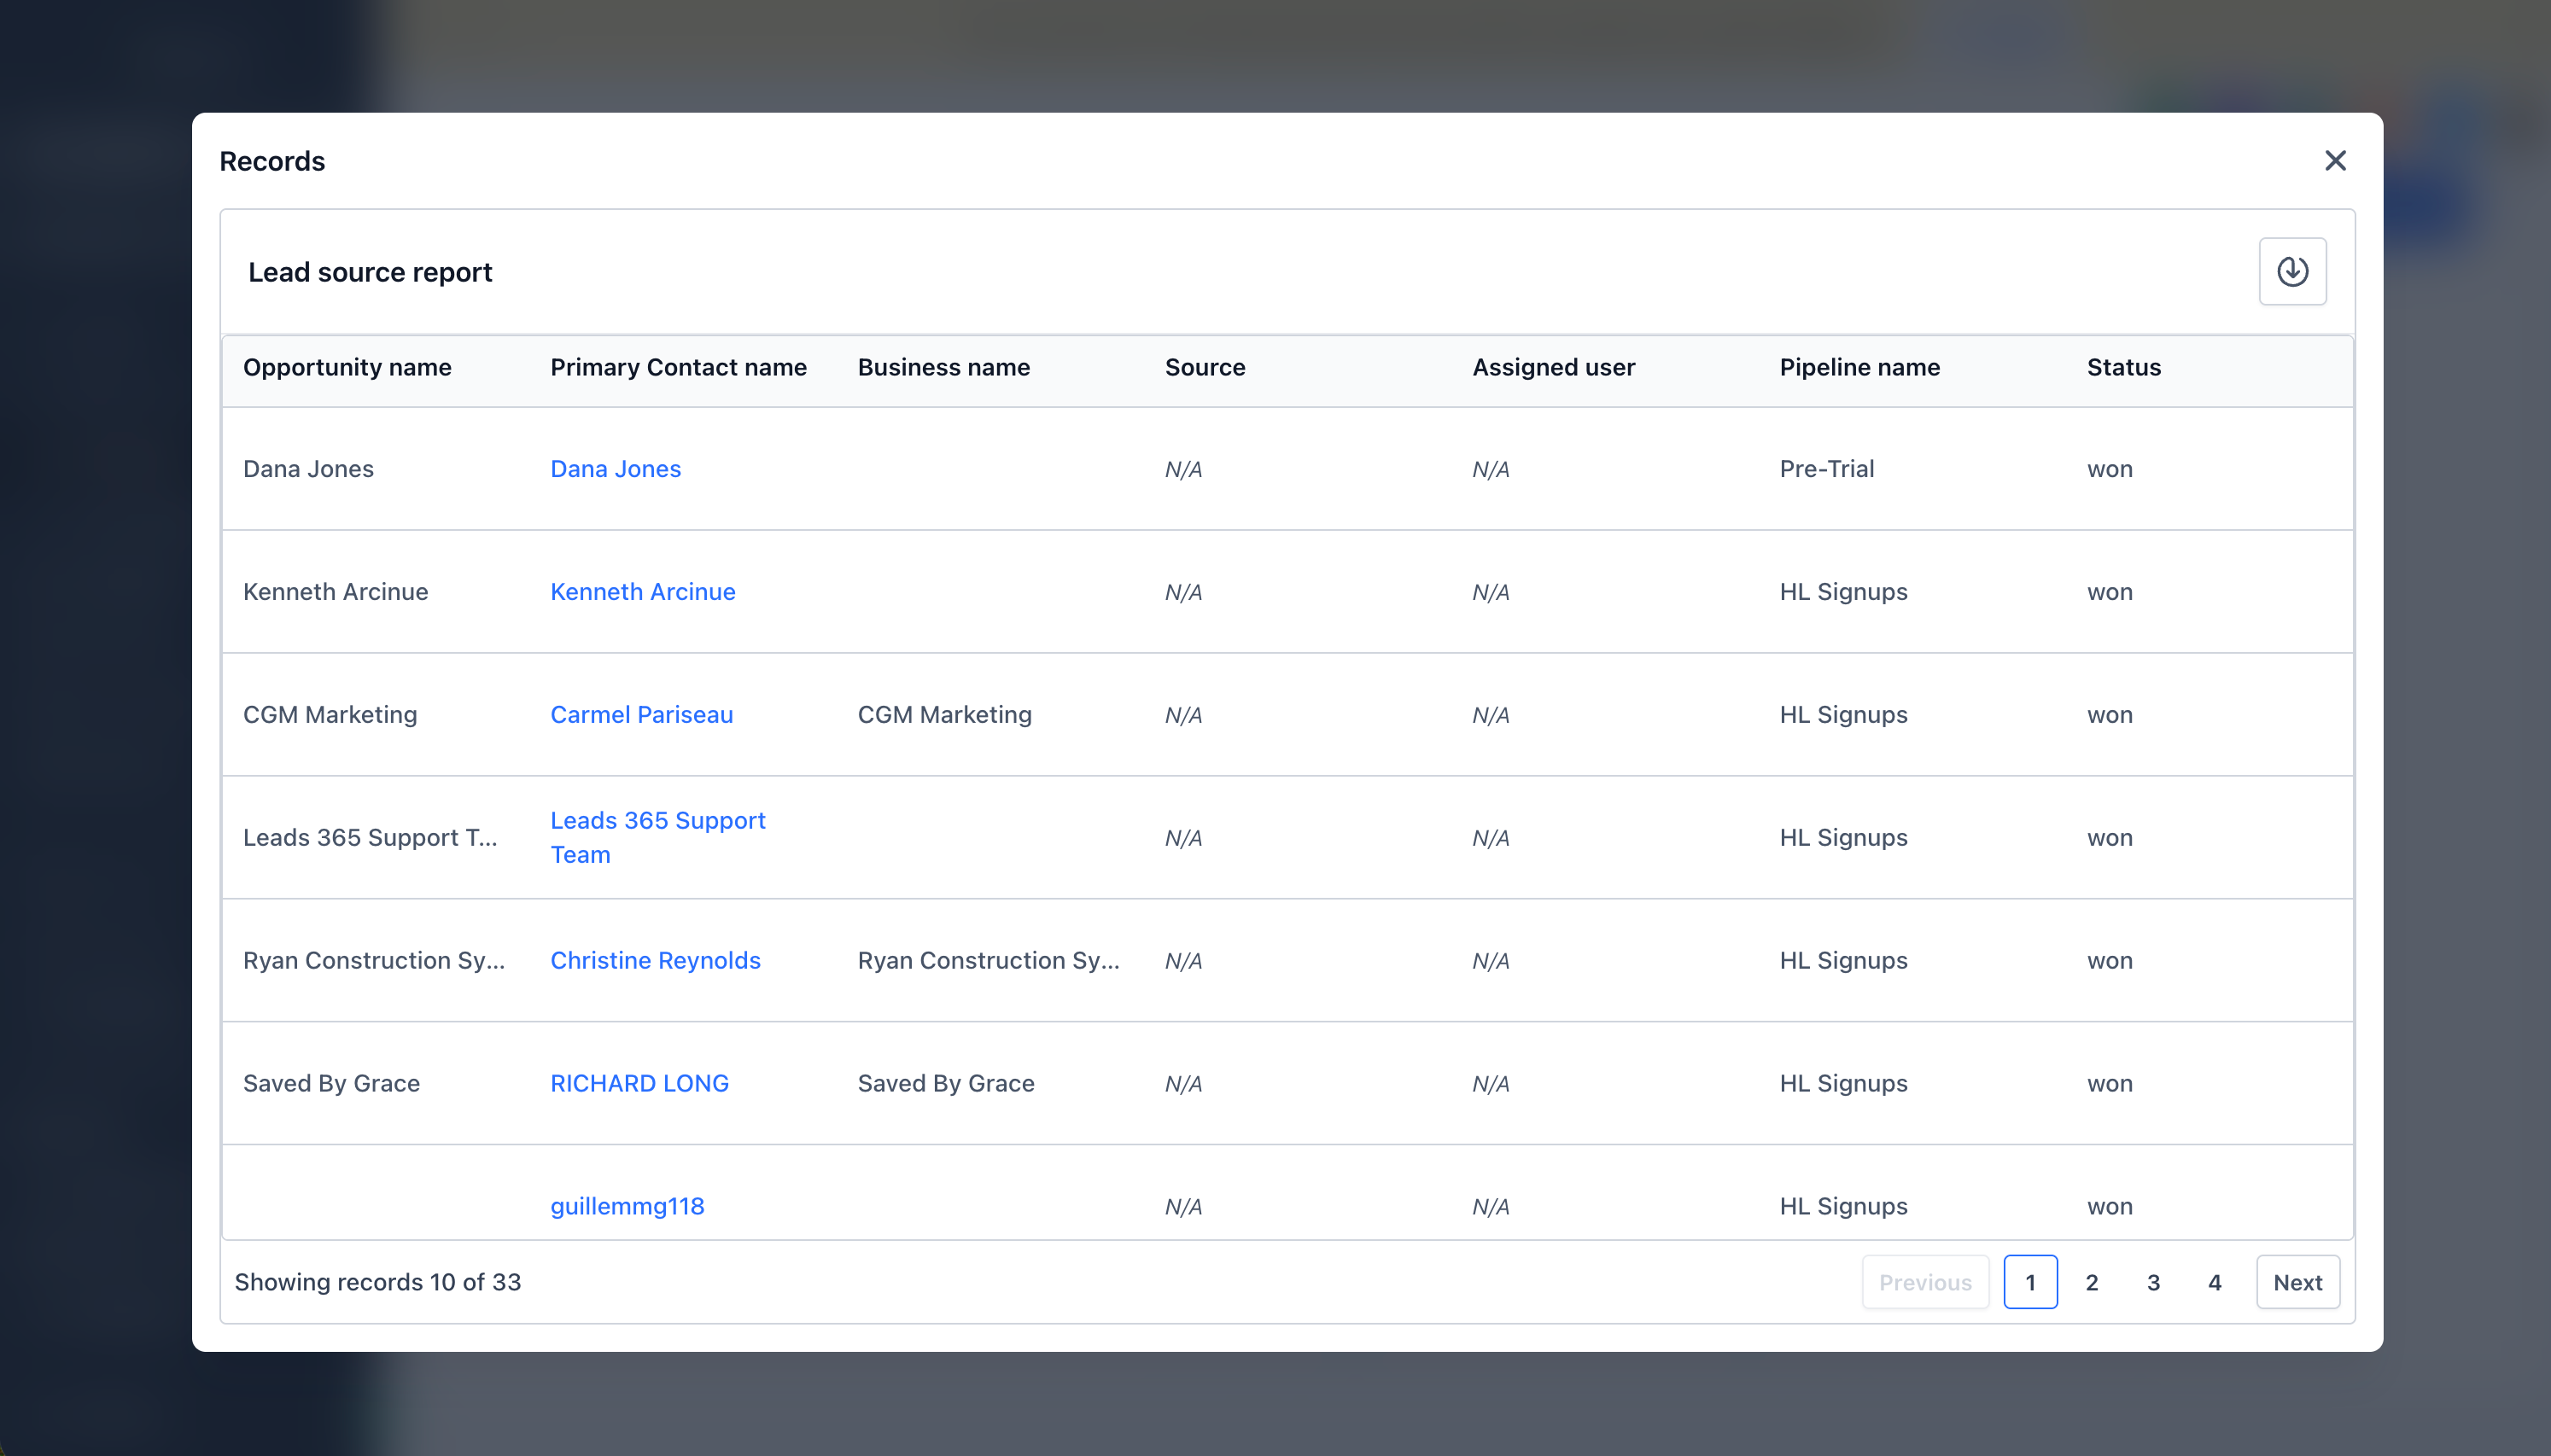
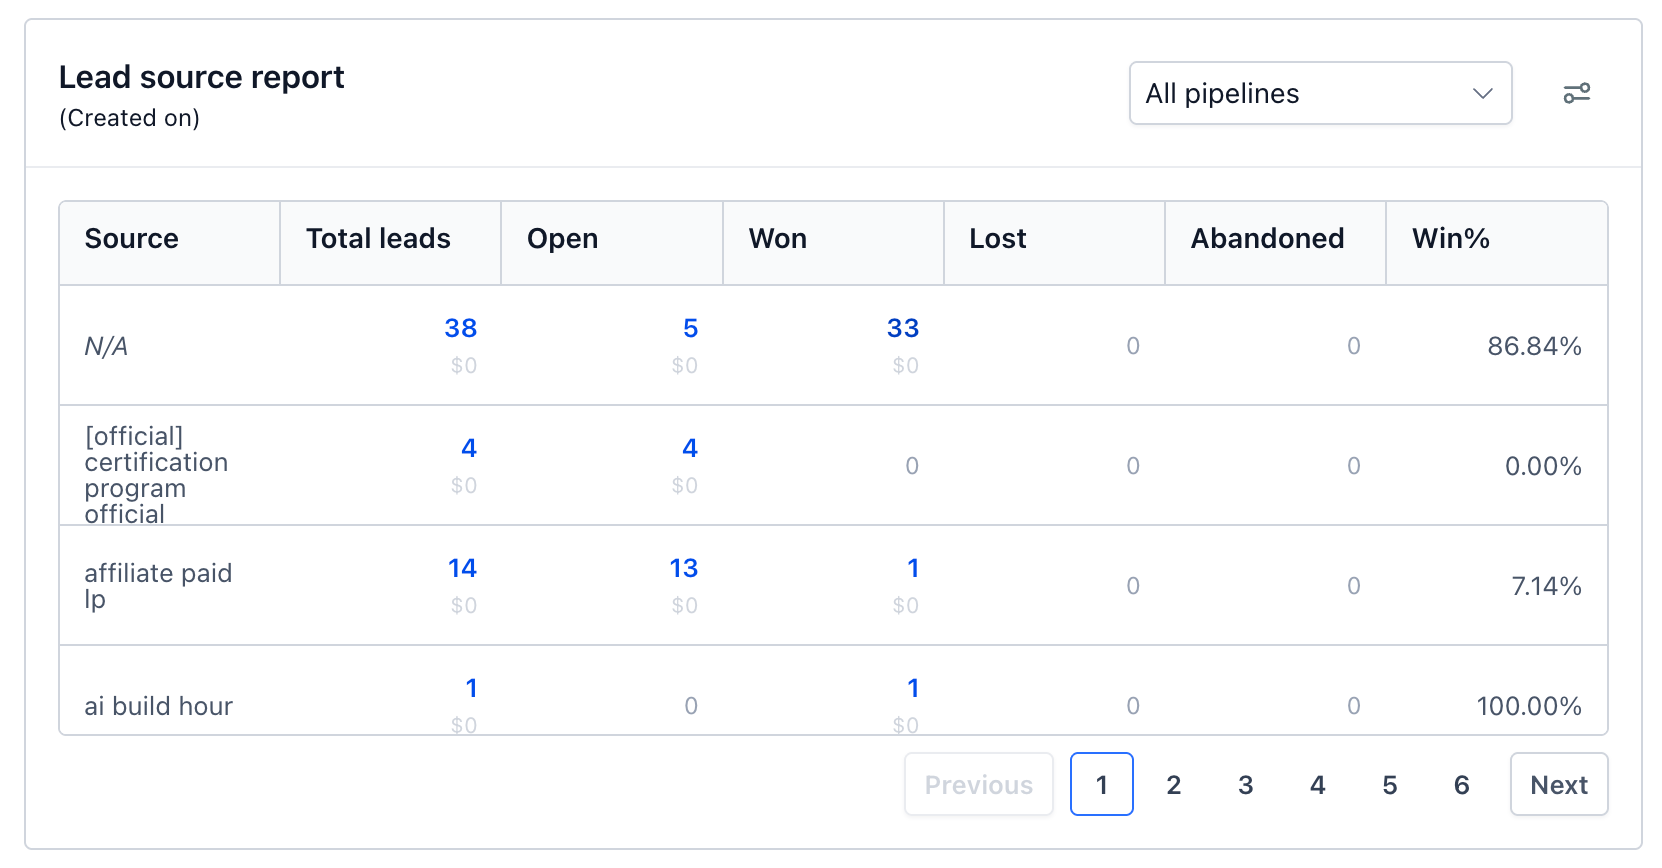
  • Drill down into any number: Click any count under Total leads, Open, Won, Lost, or Abandoned to see the exact opportunities behind it.

  • Value for every status: The report now shows the monetary value for Open, Won, Lost, and Abandoned, not just the total.

  • Find leads without a source: The Source filter now supports "Is empty" and "Is not empty".

  • Missing sources are visible: Opportunities without a source now appear as "N/A" instead of being left out.

  • Cleaner table layout: Rows have a consistent height and columns stay readable on smaller screens.

πŸ‘· How It Works:

  1. Add the Lead Source Report widget to your dashboard, or open one you already have.

  2. Each source row now shows both the count and the value for every status.

  3. Click any count greater than zero to open the list of opportunities that make up that number.

  4. To check data quality, filter Source by "Is empty" or review the "N/A" row to see which opportunities are missing a source.

Screenshot 2026-10-06 at 10

🌟 Why It Matters:

  1. From numbers to names β€” See exactly which leads sit behind a count without leaving the report or searching manually.

  2. Know what each channel is worth β€” Compare open, won, and lost value by source to see which channels actually bring in revenue.

  3. Trust your attribution β€” Spot and fix opportunities with no source so your channel reporting stays accurate.

⏭️ What's Next?

  • Support for using a custom field as the revenue source in the Lead Source Report.

πŸ“ Notes:

  1. Values are visible only to users with permission to view lead value.

  2. Drill-down is available on any count greater than zero.

Earlier updates