Changelog

Follow new updates and improvements to Growably.

Conversations: Add Internal Comments Using Workflows

Overview

You can now automatically add Internal Comments to conversations using Workflows. Until now, teams had to manually add internal comments to share context, provide instructions, or keep other team members informed. With this workflow action, you can automate internal comments based on specific events, ensuring important information is captured directly in the conversation without manual effort.

What’s New?

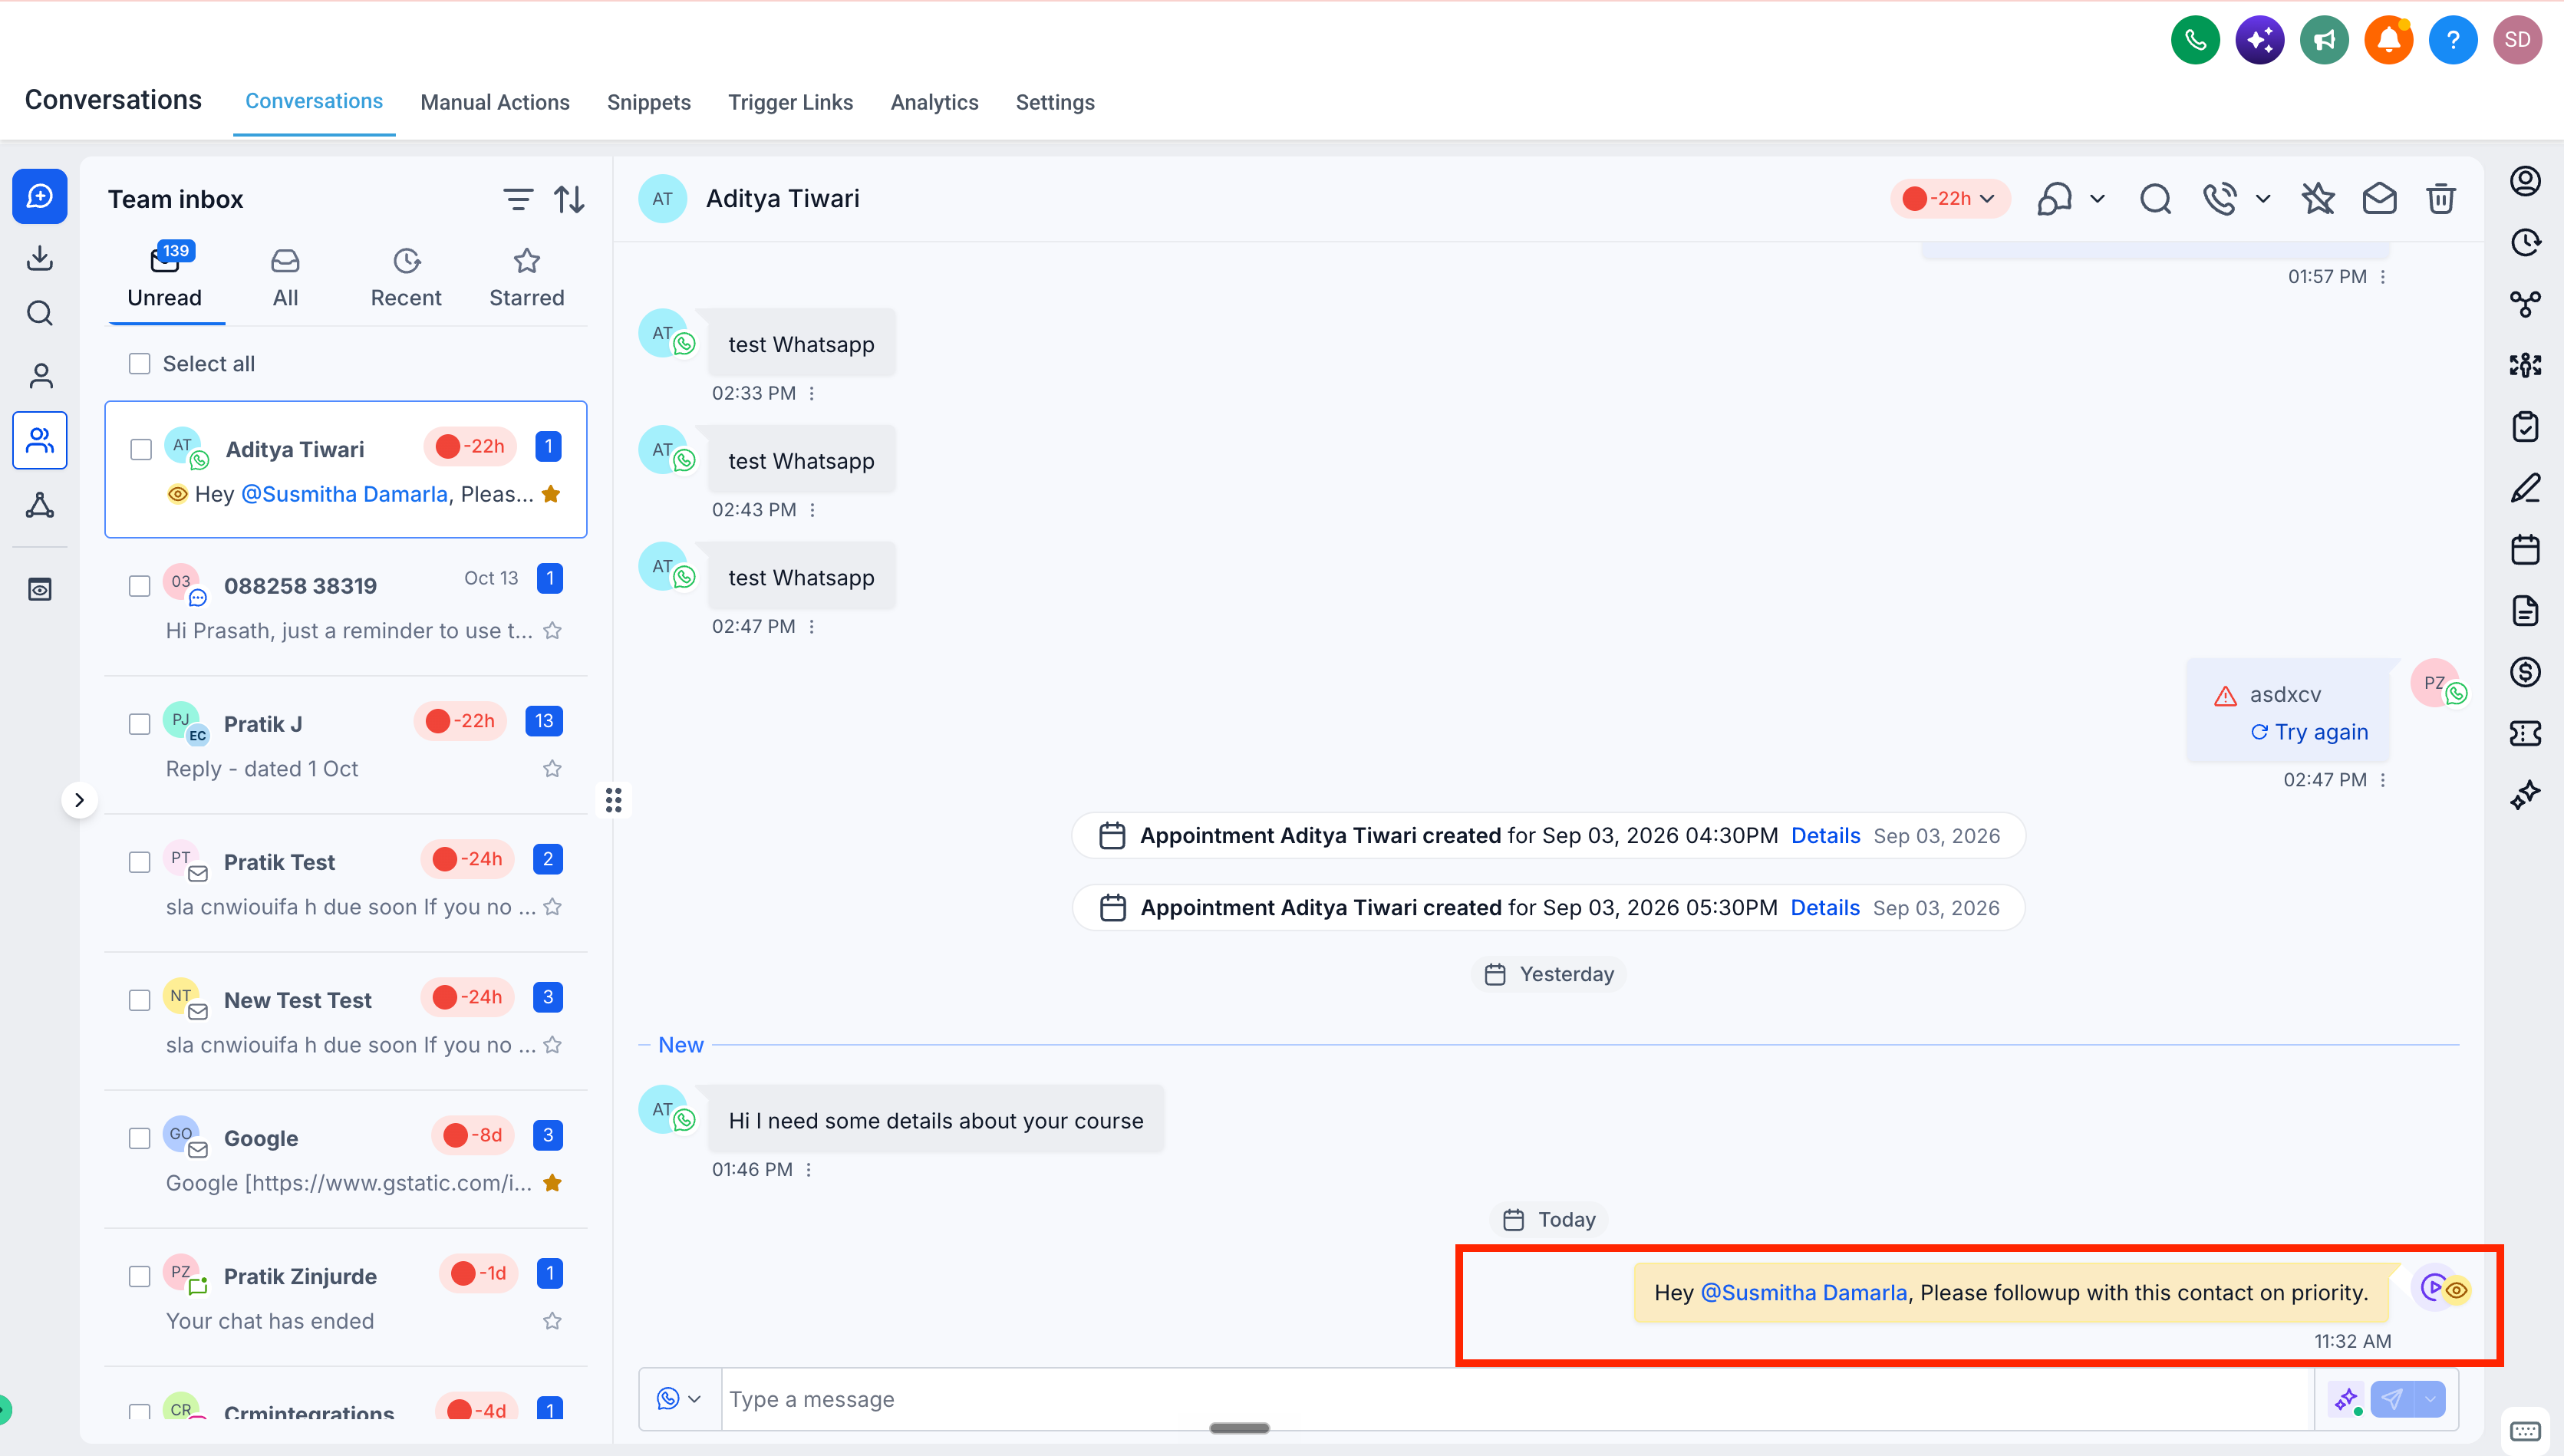
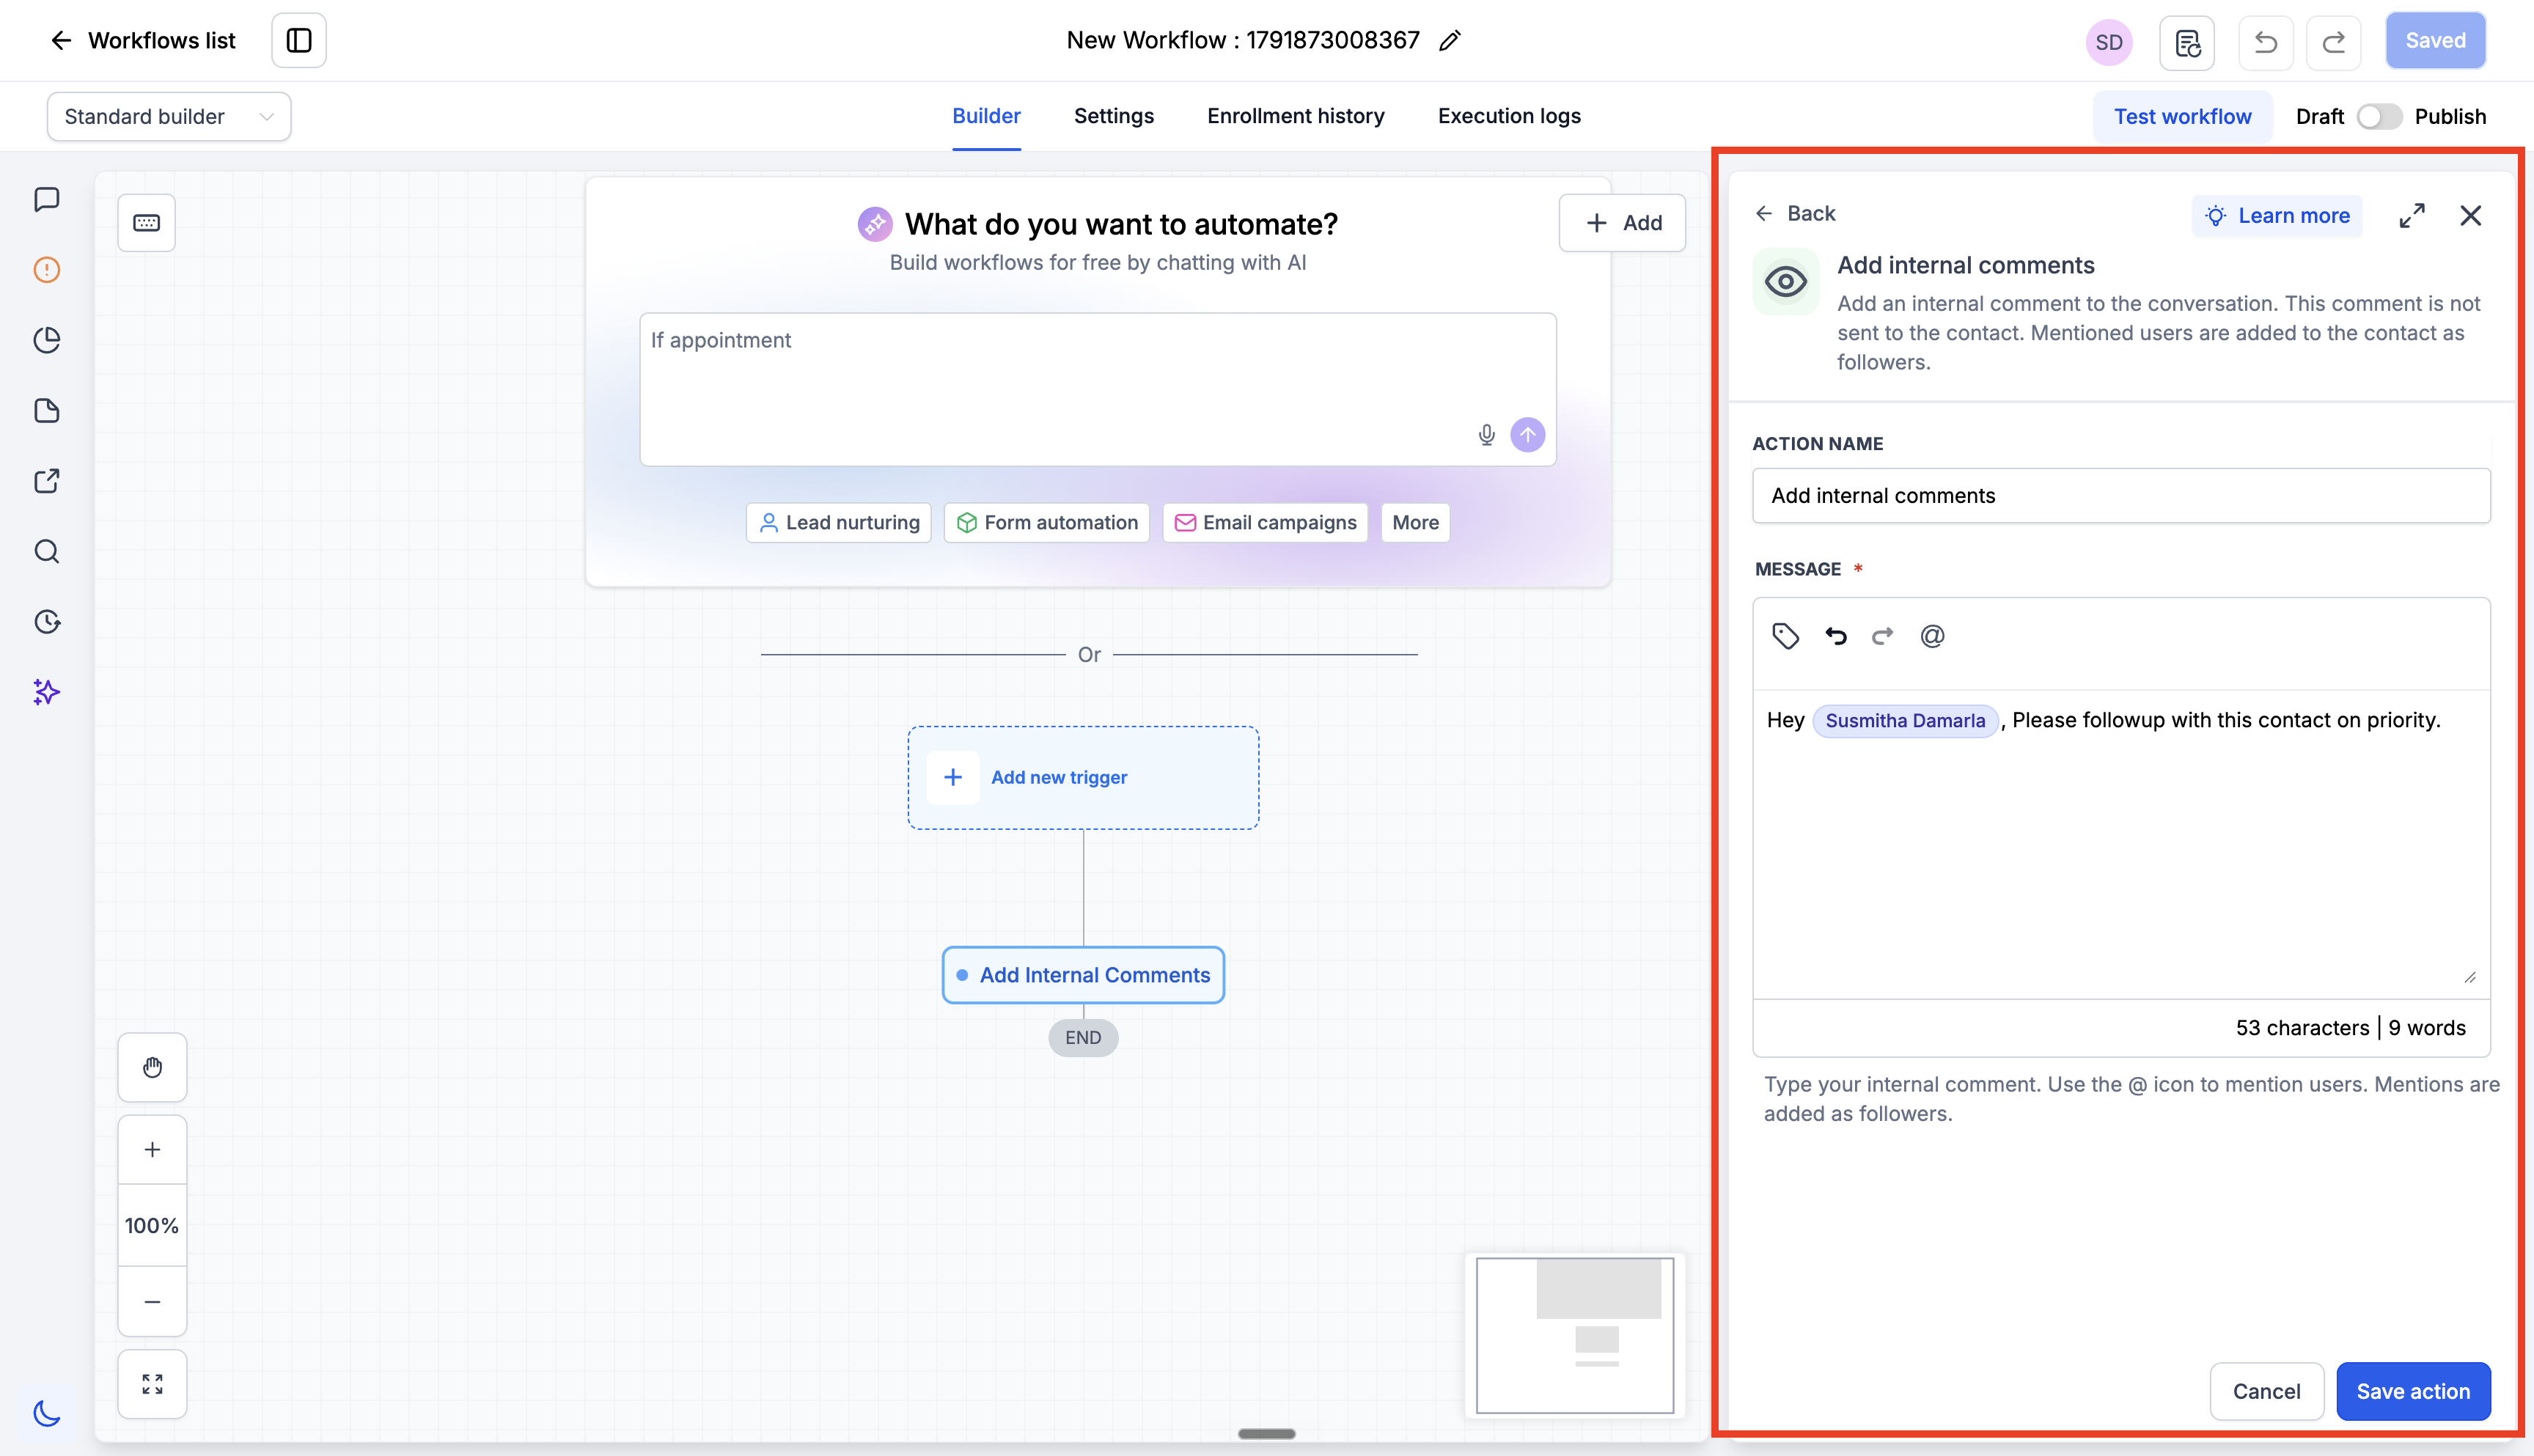
We've introduced a new Add Internal Comment workflow action that lets you automatically post internal comments to conversations when a workflow runs. You can use this to share important context, provide follow-up instructions, or notify specific team members by @mentioning users directly in the comment.

For example, when a high-priority lead enters a workflow, you can automatically add an internal comment mentioning the assigned team member with instructions for the next steps. These comments appear directly in the conversation history, keeping internal communication and customer context in one place without sending anything to the customer.

image

How to Use

  • Go to Automation → Workflows.

  • Create a new workflow or open an existing one.

  • Add the Internal Comment action.

image
  • Enter your comment and @mention team members as needed.

  • Save and publish the workflow.

Why It Matters

This helps teams automate internal communication, keep everyone informed, and ensure important customer context reaches the right people at the right time.

NewAutomations

Jotform - New Actions & Triggers in Workflows

You can now automate Jotform directly inside Workflows — act on form submissions and signed contracts the moment they land, and create Jotform submissions from any workflow.

✅ What's New

Triggers (events in Jotform that start a workflow in Growably):

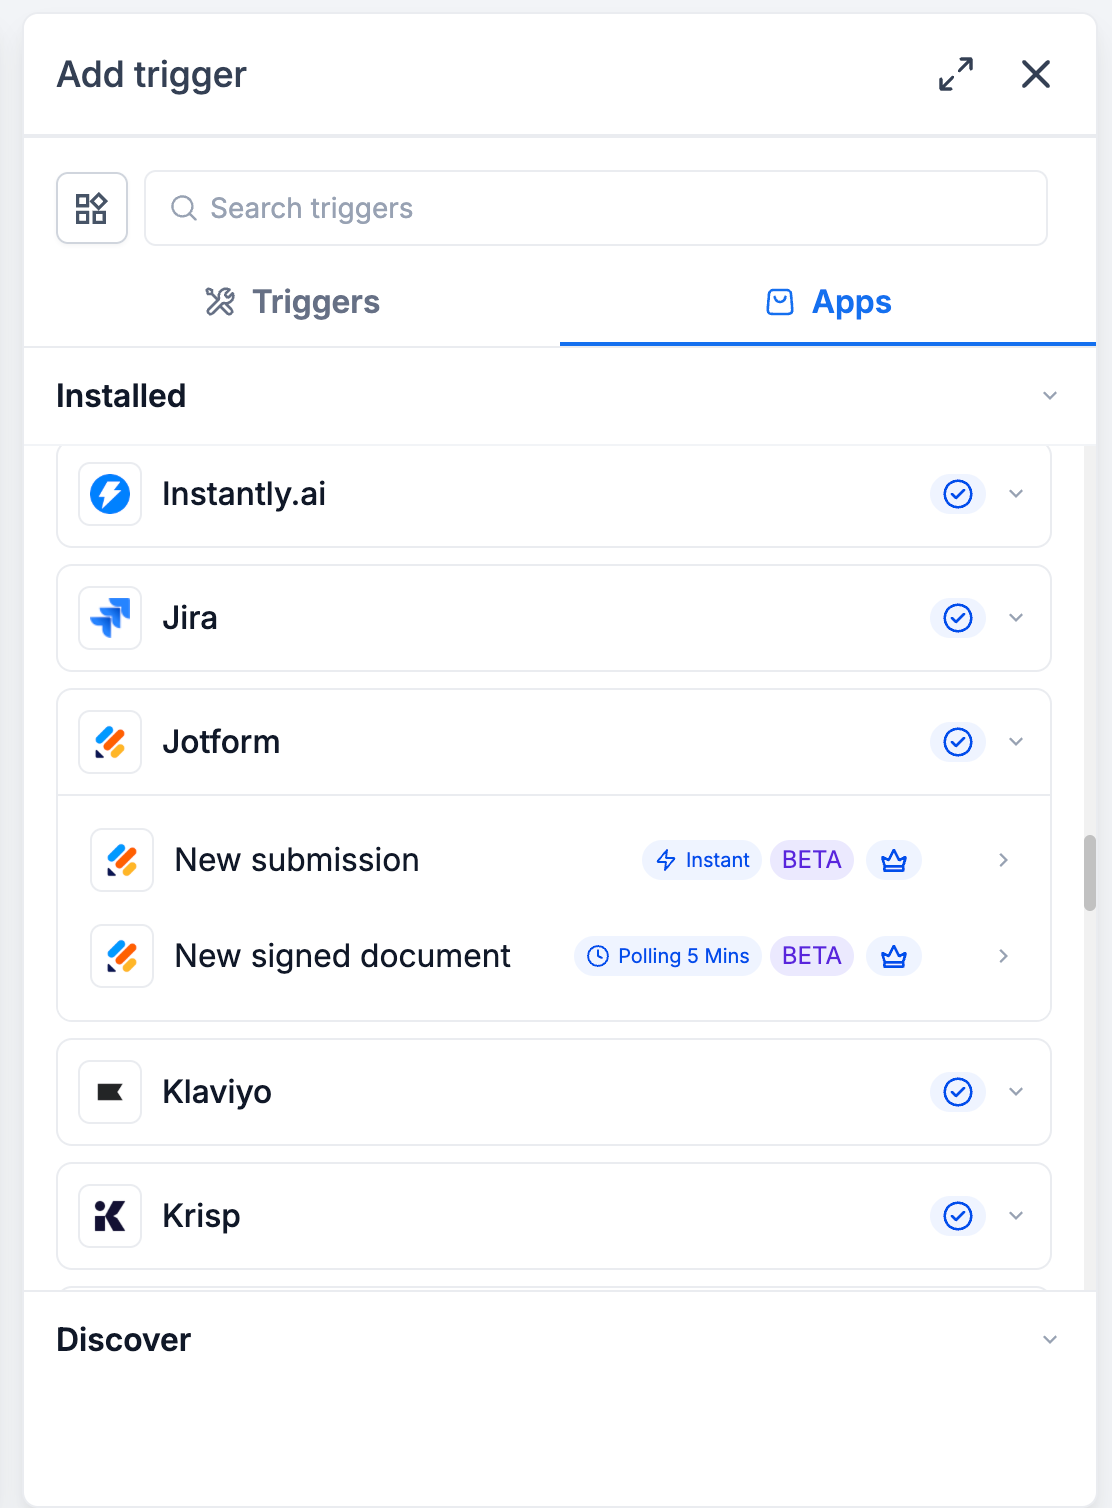
  • New Submission – Starts a workflow instantly when a new response is submitted to a Jotform form.

  • New Signed Document – Starts a workflow when a document with an e-signature field is completed and signed. Checked every 5 minutes.

image

Actions (steps you can run in Jotform from a Growably workflow):

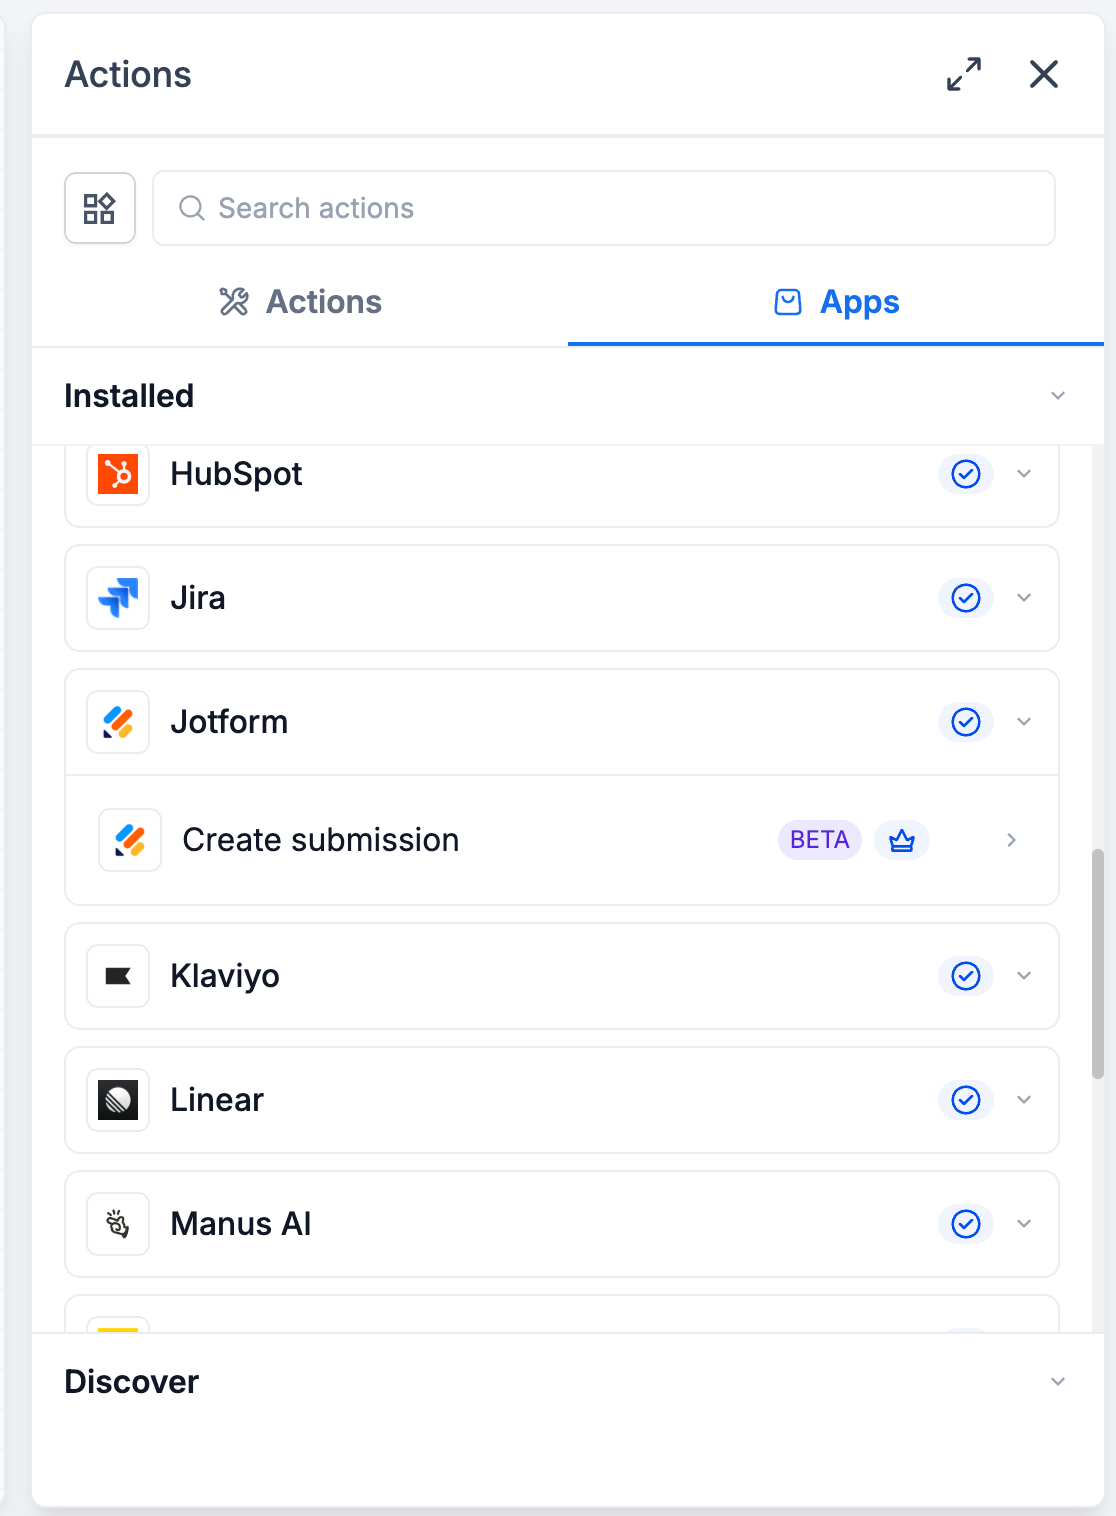
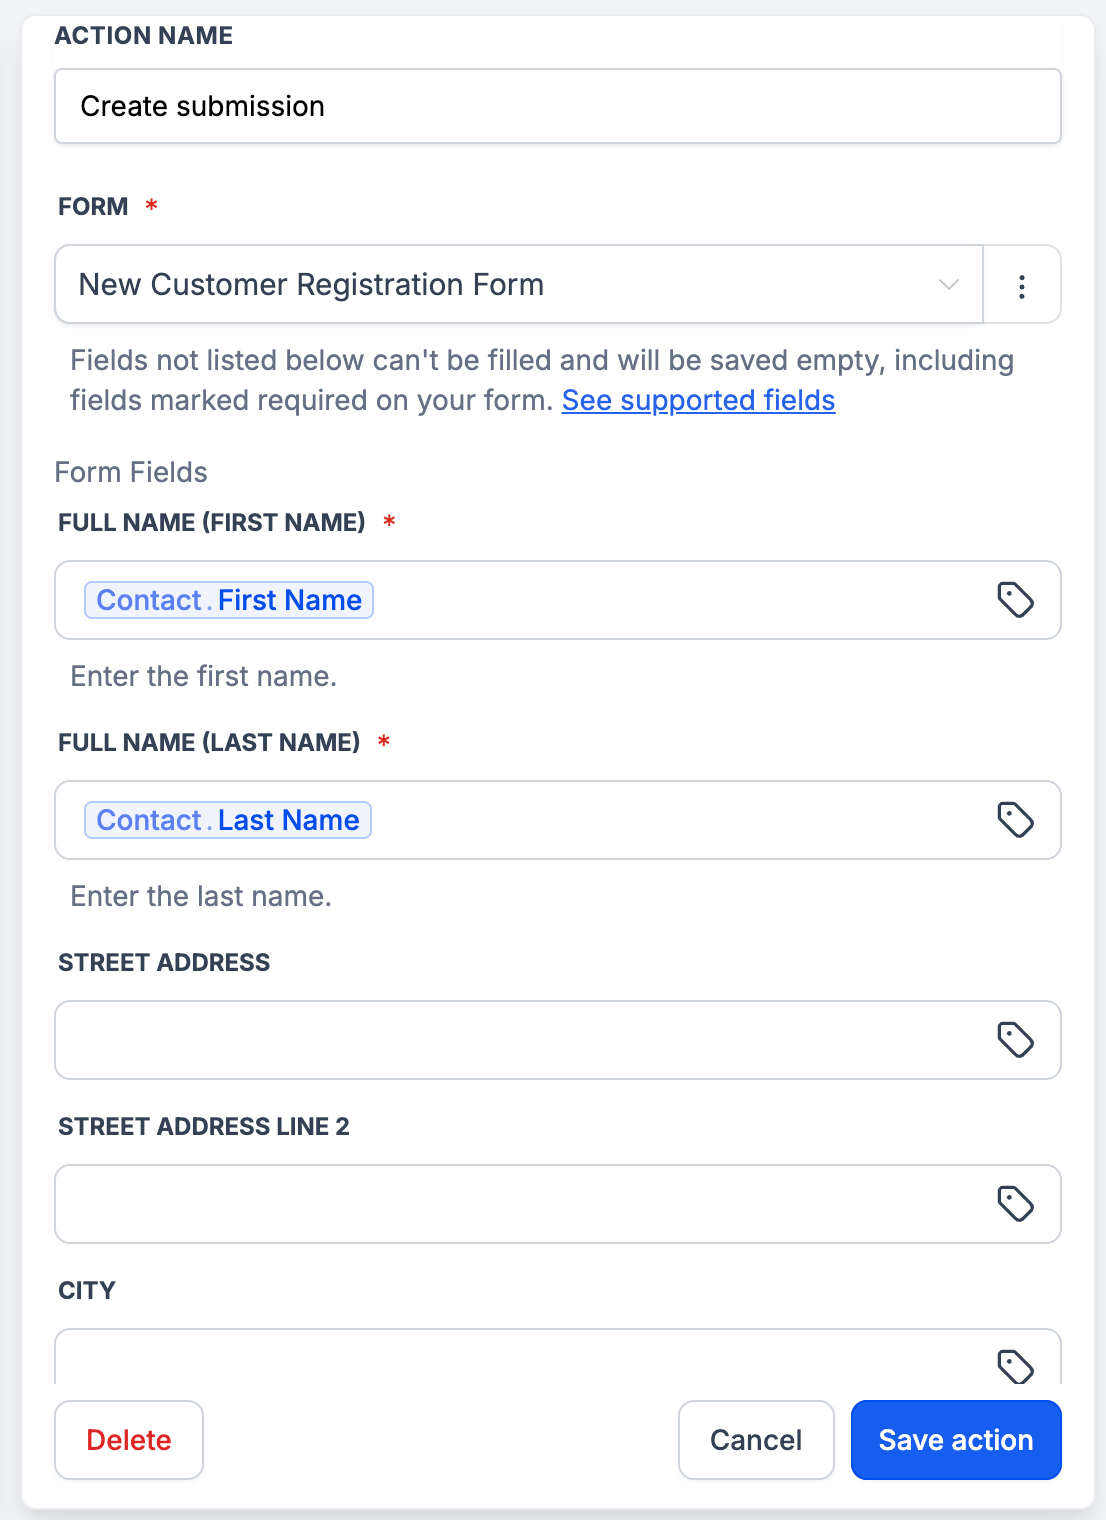
  • Create Submission – Add a new submission to any form in your Jotform account, with values mapped from your workflow.

image

🚀 Why This Matters

With Jotform actions and triggers, you can:

  • Follow up on new leads the moment a form is submitted, with no manual import.

  • Kick off onboarding the moment a contract is signed, with no one watching an inbox.

  • Write phone, event and walk-in sign-ups into Jotform so your form reports show every lead, not just the online ones.

  • Drop third-party zaps and webhooks, cutting cost and failure points.

💡 Example Use Cases

Lead capture and CRM sync

A "Website Lead Form" submission creates the contact in HighLevel, sends an acknowledgment email, tags them "New Lead", and posts to your sales channel in Slack.

Signed contract to project kickoff

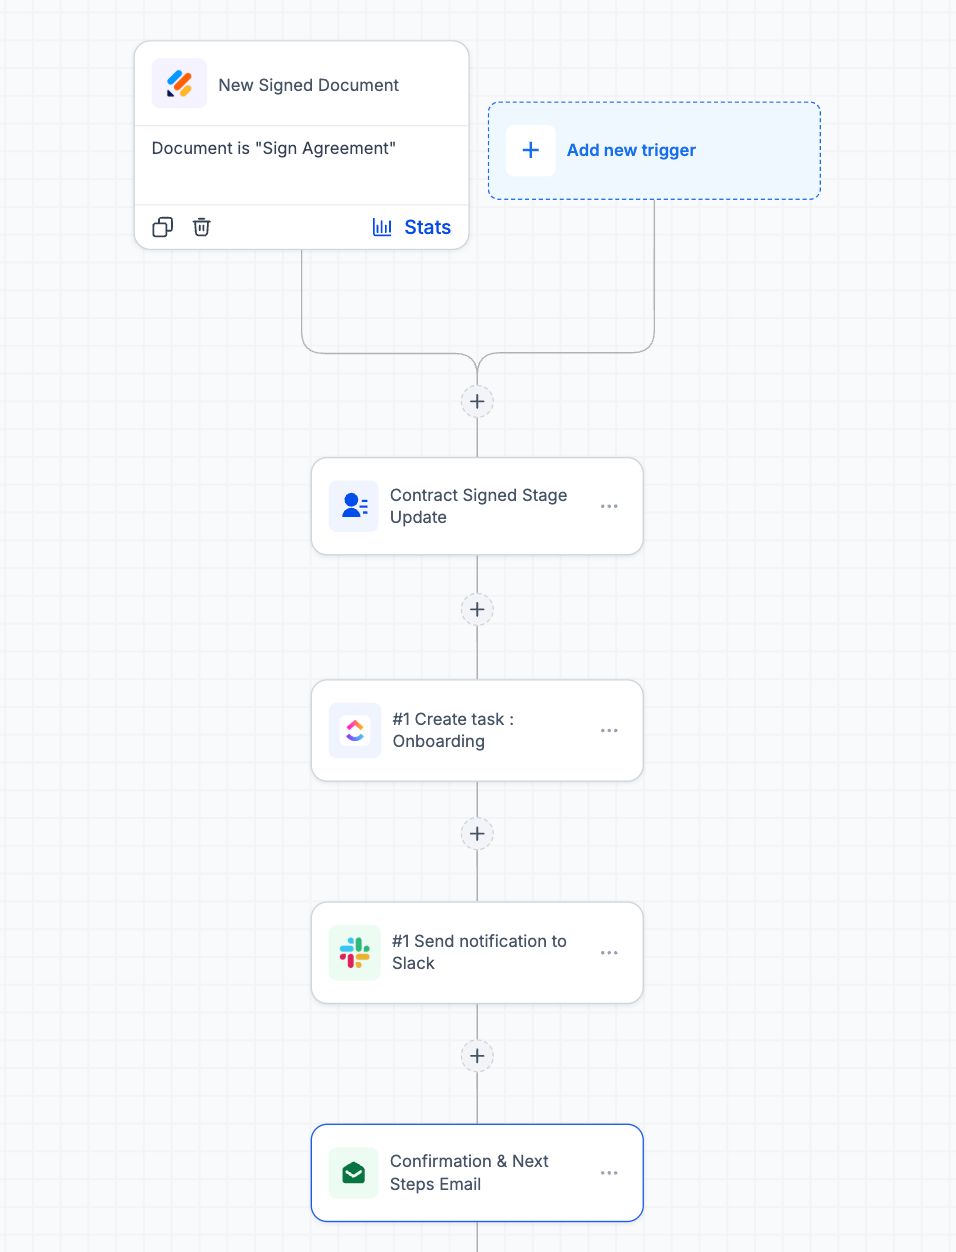
A client signs your "Service Agreement" in Jotform Sign → their stage updates to "Contract Signed", an onboarding task is created in ClickUp, #operations is notified, and the client gets their next steps.

Offline sign-up to Jotform

Someone registers for an event over the phone → the workflow writes a matching submission into your Jotform event form, so every attendee appears in one report.

Appointment to intake form

A consultation is booked in HighLevel → an intake submission is created in Jotform with the client's details already filled in.

image

🔌 How to Connect

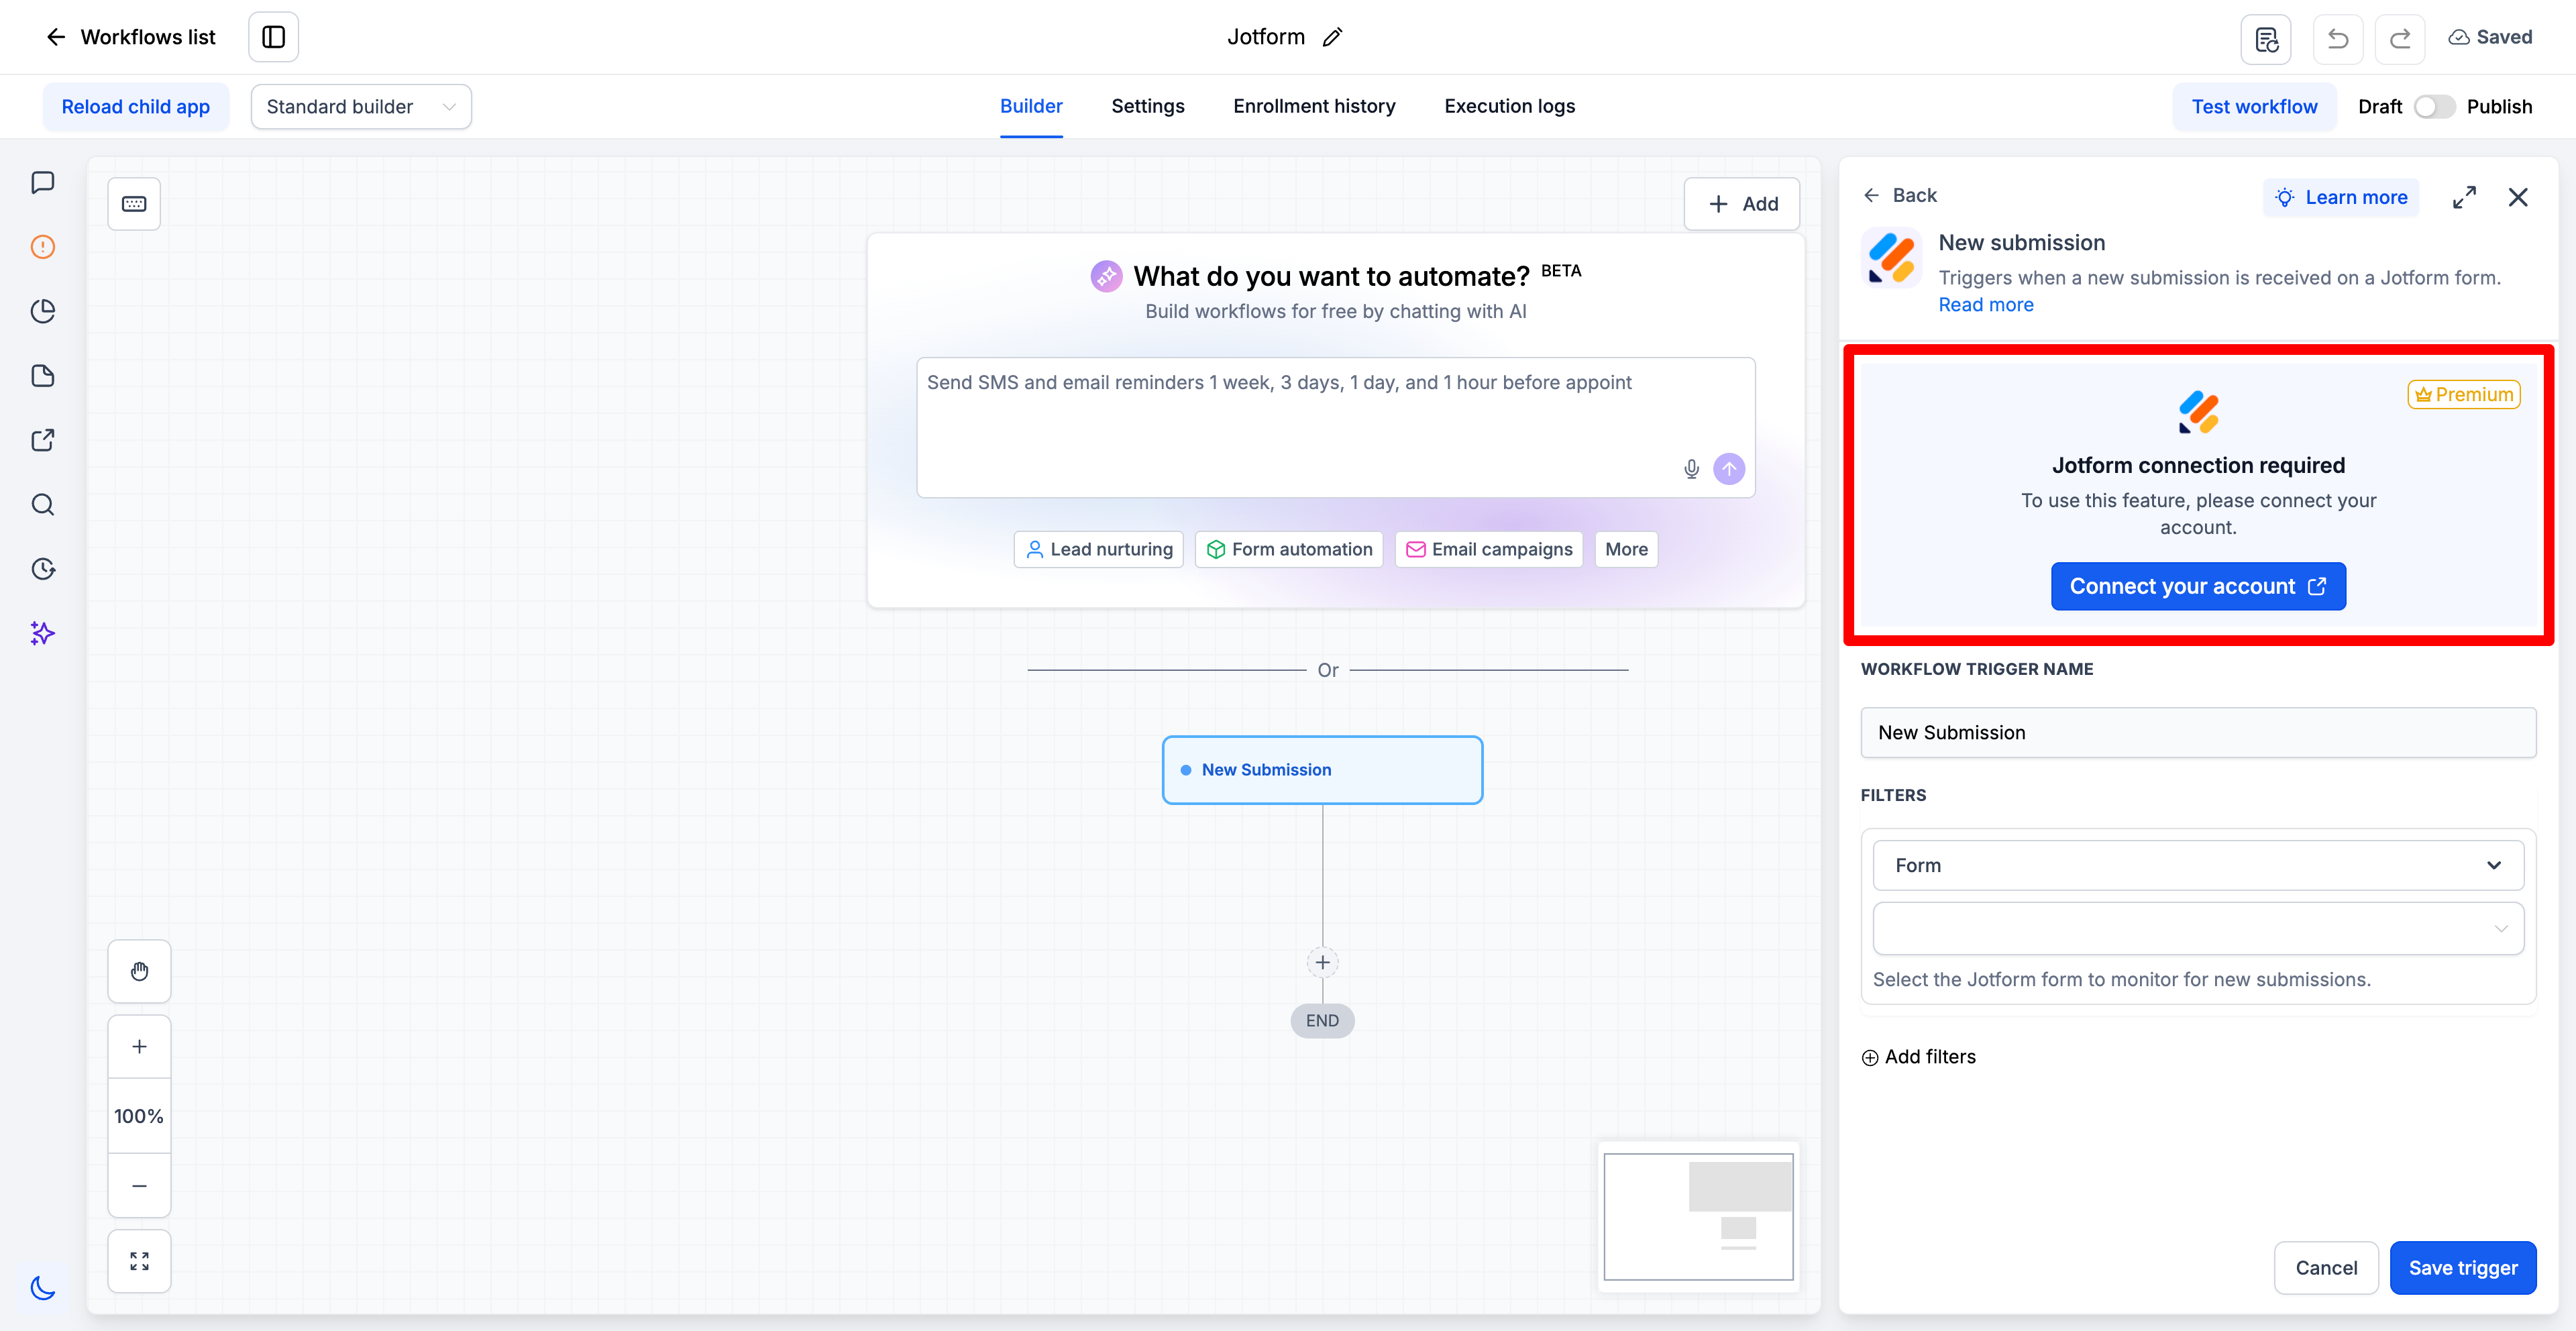
  1. Open the Workflow Builder and search for "Jotform" actions or triggers.

  2. Click

    Connect Now

    when prompted and sign in with your Jotform account.

  3. Once connected, select a form and its fields load automatically for mapping.

  4. Alternatively, go to

    Settings → Integrations → Jotform

    to connect your account first.

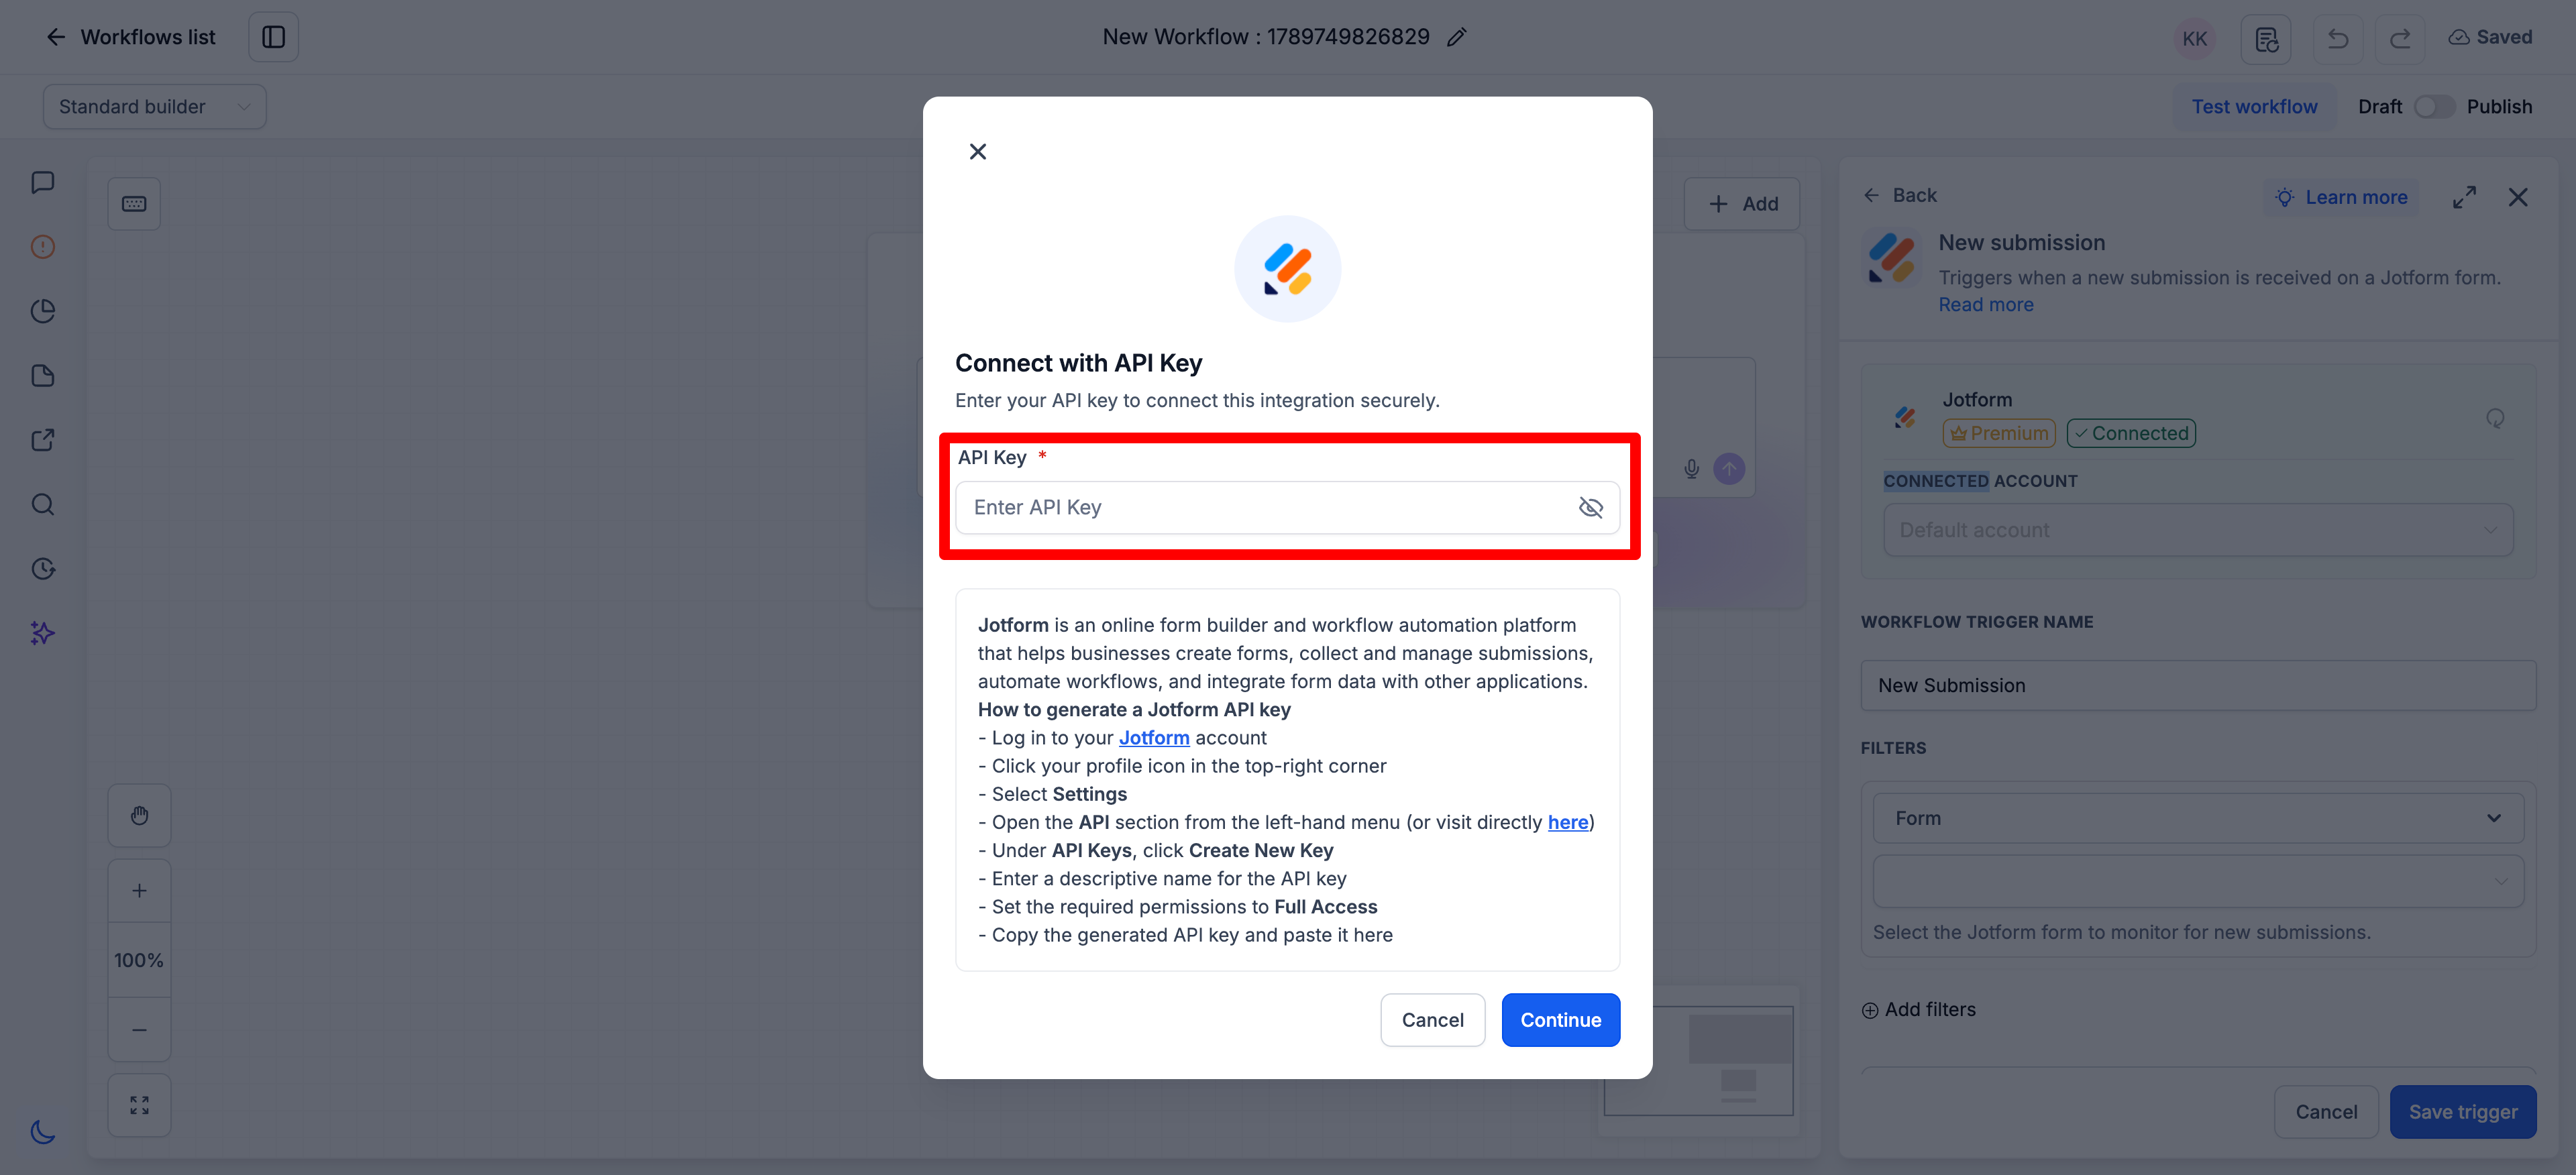
image
image

⚠️ Notes & Details

Supported fields in Create Submission: Full Name, Email, Address, Phone, Short Text, Long Text, Number, Dropdown, Single Choice, Multiple Choice, Yes/No, Star Rating, Scale Rating, Date Picker and Time.

image

Fields that aren't supported won't appear in the mapping list.

These include File Upload, Signature, Appointment, Payment, Product List, Input Table, Fill in the Blanks, Spinner, Emoji Slider, Image Choice, Captcha and widgets such as Terms and Conditions and Checklist.

  • Unsupported fields are saved empty. This applies even when the field is marked required on your form — Jotform accepts the submission anyway and marks it active, so nothing fails in your workflow.

  • Submissions created by this action carry no payment, amount, product or booked time slot. On a payment form, they look identical to paid submissions, so treat them as unpaid unless payment was collected another way.

  • The New Signed Document trigger reads documents signed in Jotform. Create Submission can't write a signature — signatures have to be captured from a person.

  • Dates use YYYY-MM-DD and times use HH:MM.

  • Field support is expanding — more types will be added in future releases.

  • Coming next: Assign Form and Assign Prefilled Form, so you can send a form out for someone to complete rather than writing the submission yourself.
NewAutomations

Workflow Publish & Validation Gate

Publishing a workflow just got a lot safer. If your workflow has unresolved configuration issues, we now stop the publish, show you exactly what is broken, and help you fix it on the spot. Broken workflows no longer slip silently into production.

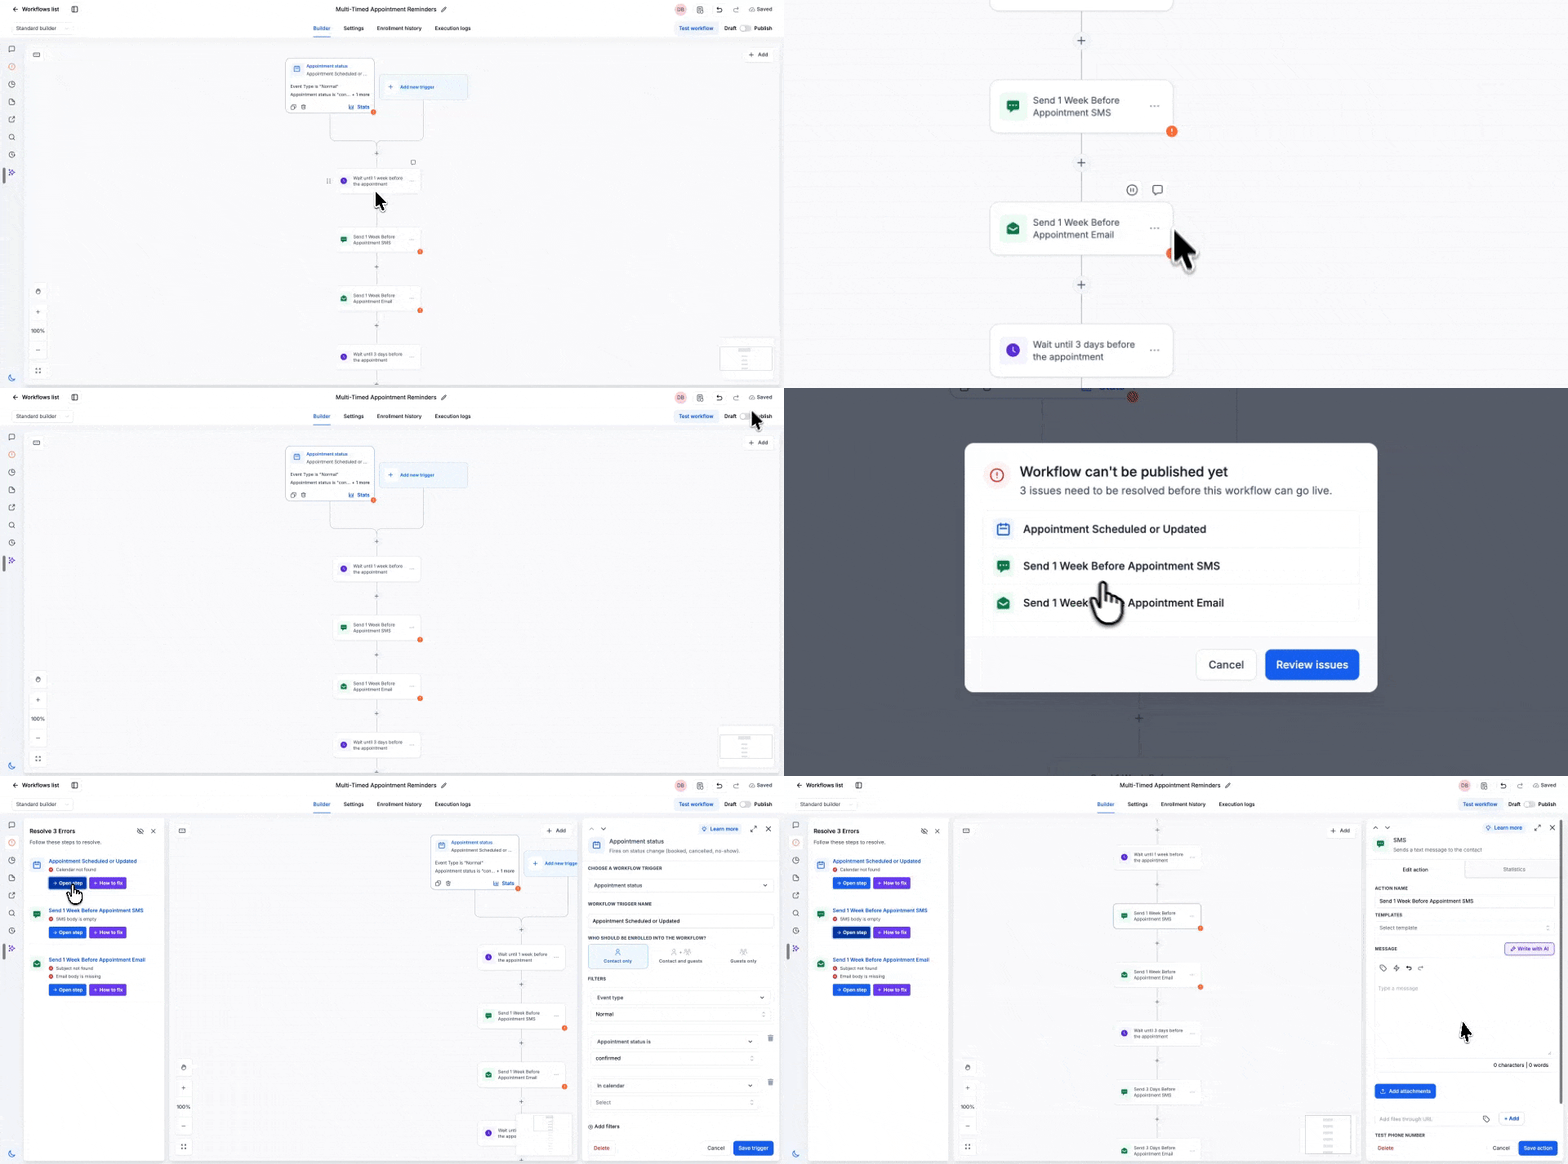
publish workflow 30fps

What's New

  1. One place for every error

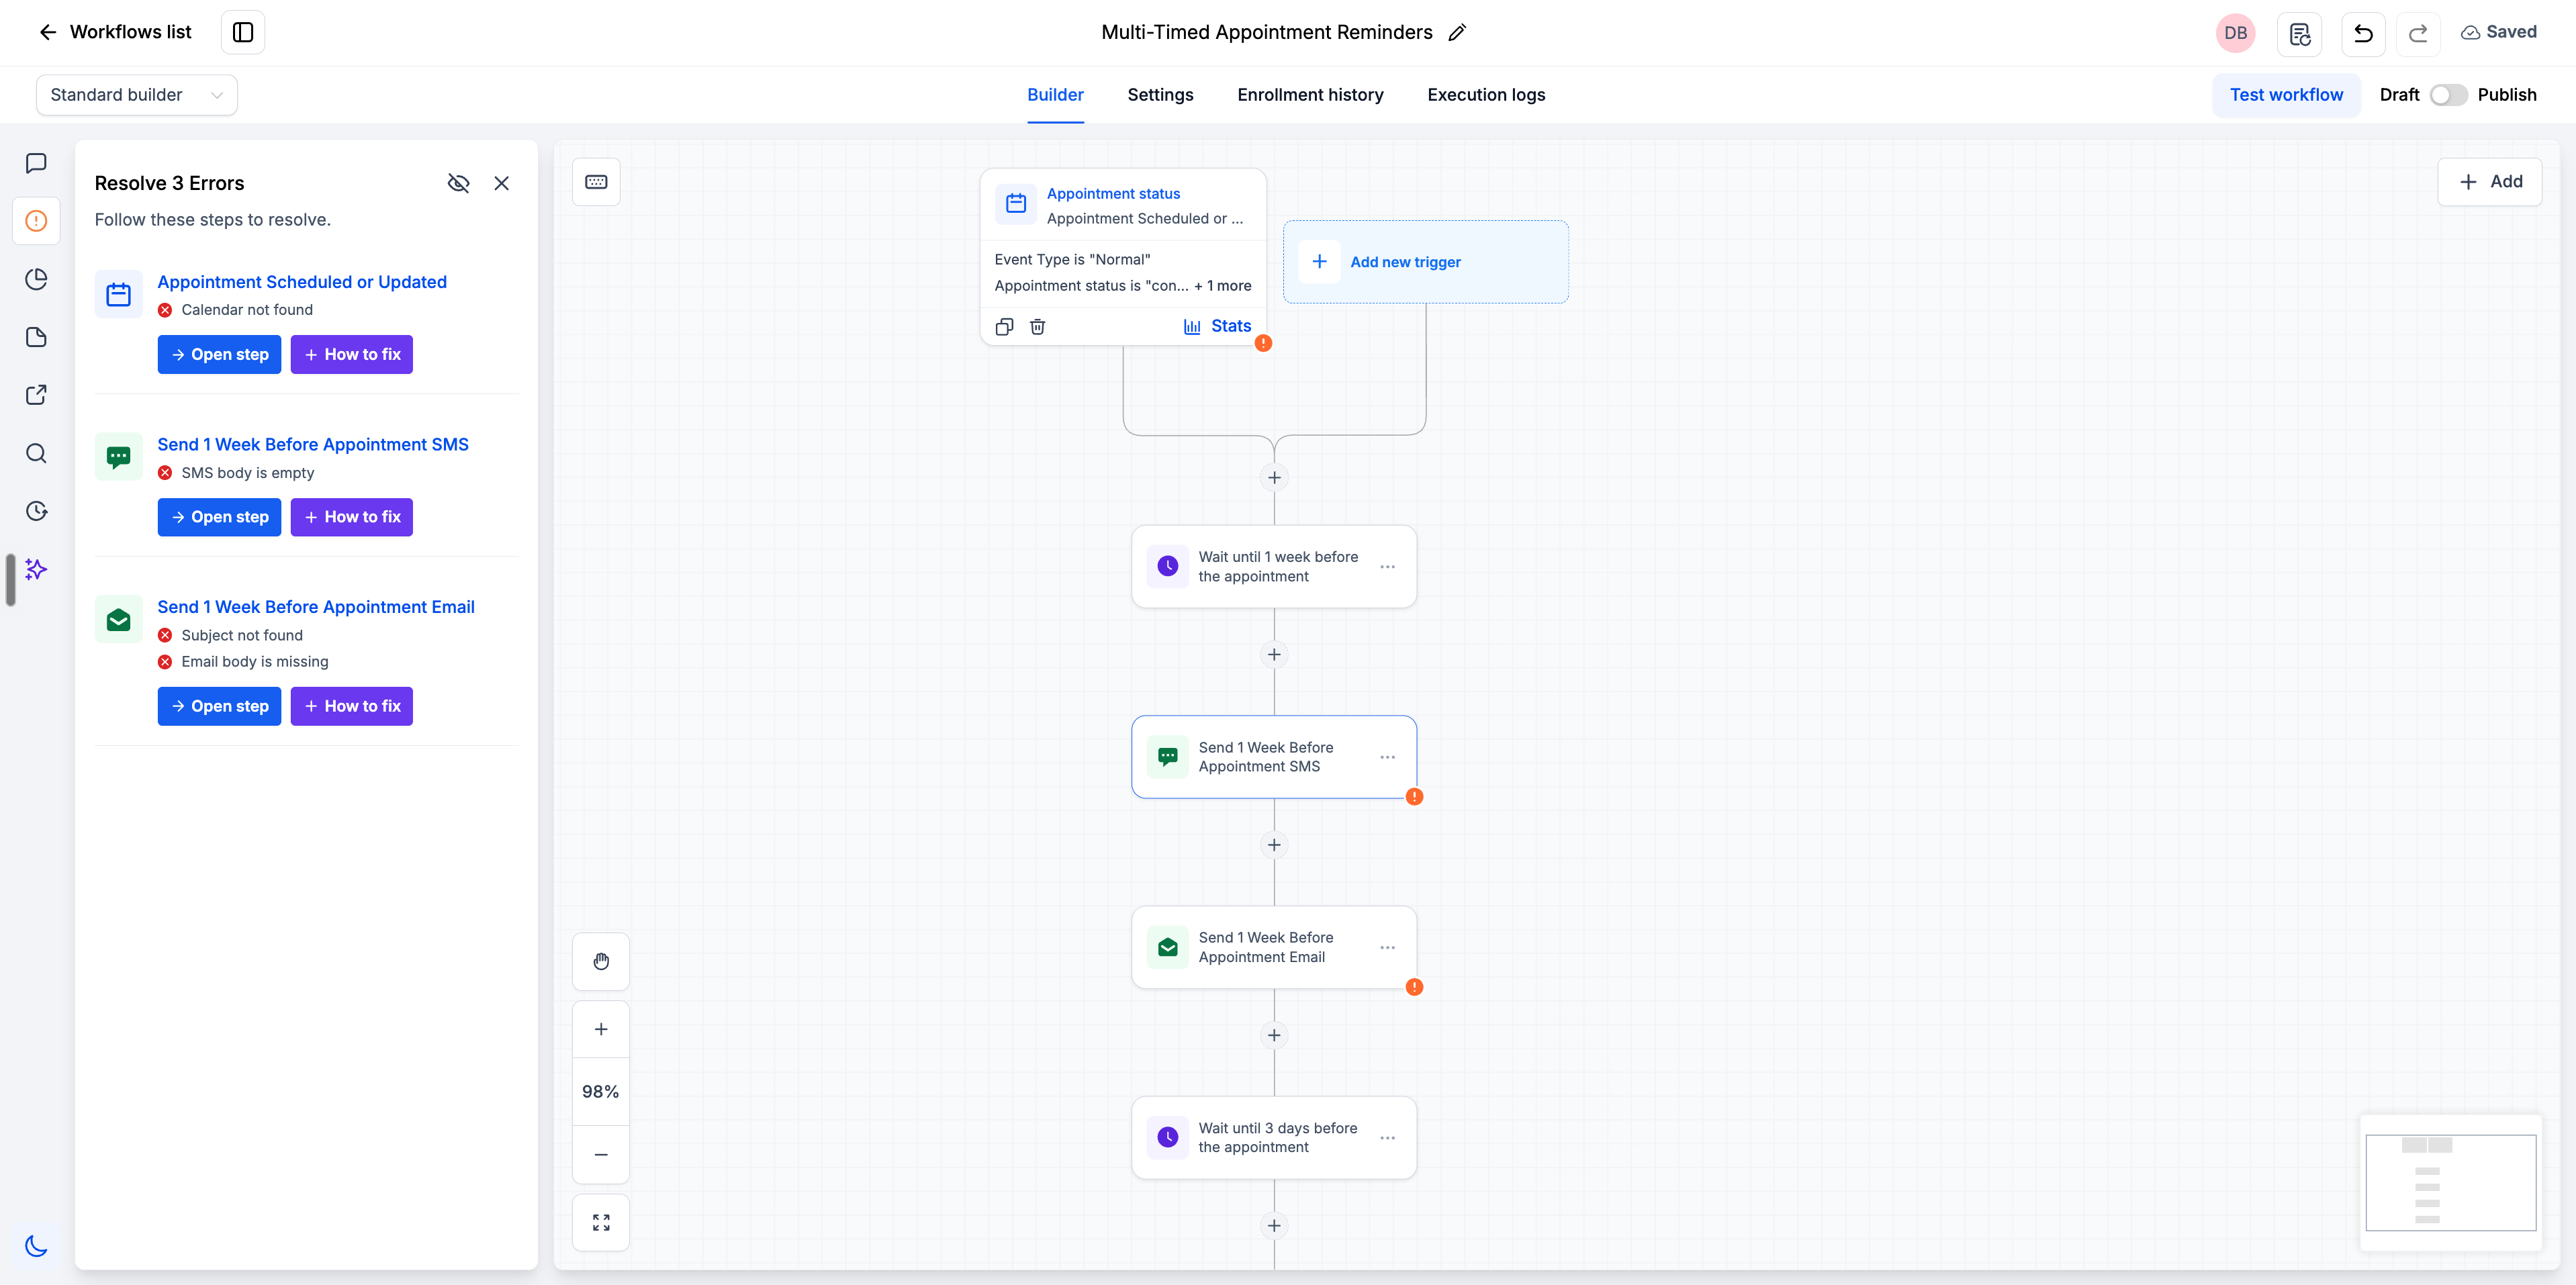
  • Frontend and backend validations are now merged into a single Highlight Error sidebar.

  • Earlier, the same workflow could surface different errors in different UIs with no consistency between them. Now every error lands in one coherent view, no matter where it comes from.

  • Each error carries two clear actions instead of hidden ones: open the step directly, or take AI's help to resolve it.

Screenshot 2026-09-11 at 5
  1. Save your progress even when errors exist

  • Auto save and manual save now work even when errors are present on the canvas.

  • Earlier we blocked the save entirely, which threw repeated error toasters and felt like a bug to our users.

  • You can now stop midway, keep everything you have built, and come back to fix the rest later.

  1. Publish is blocked until the workflow is clean

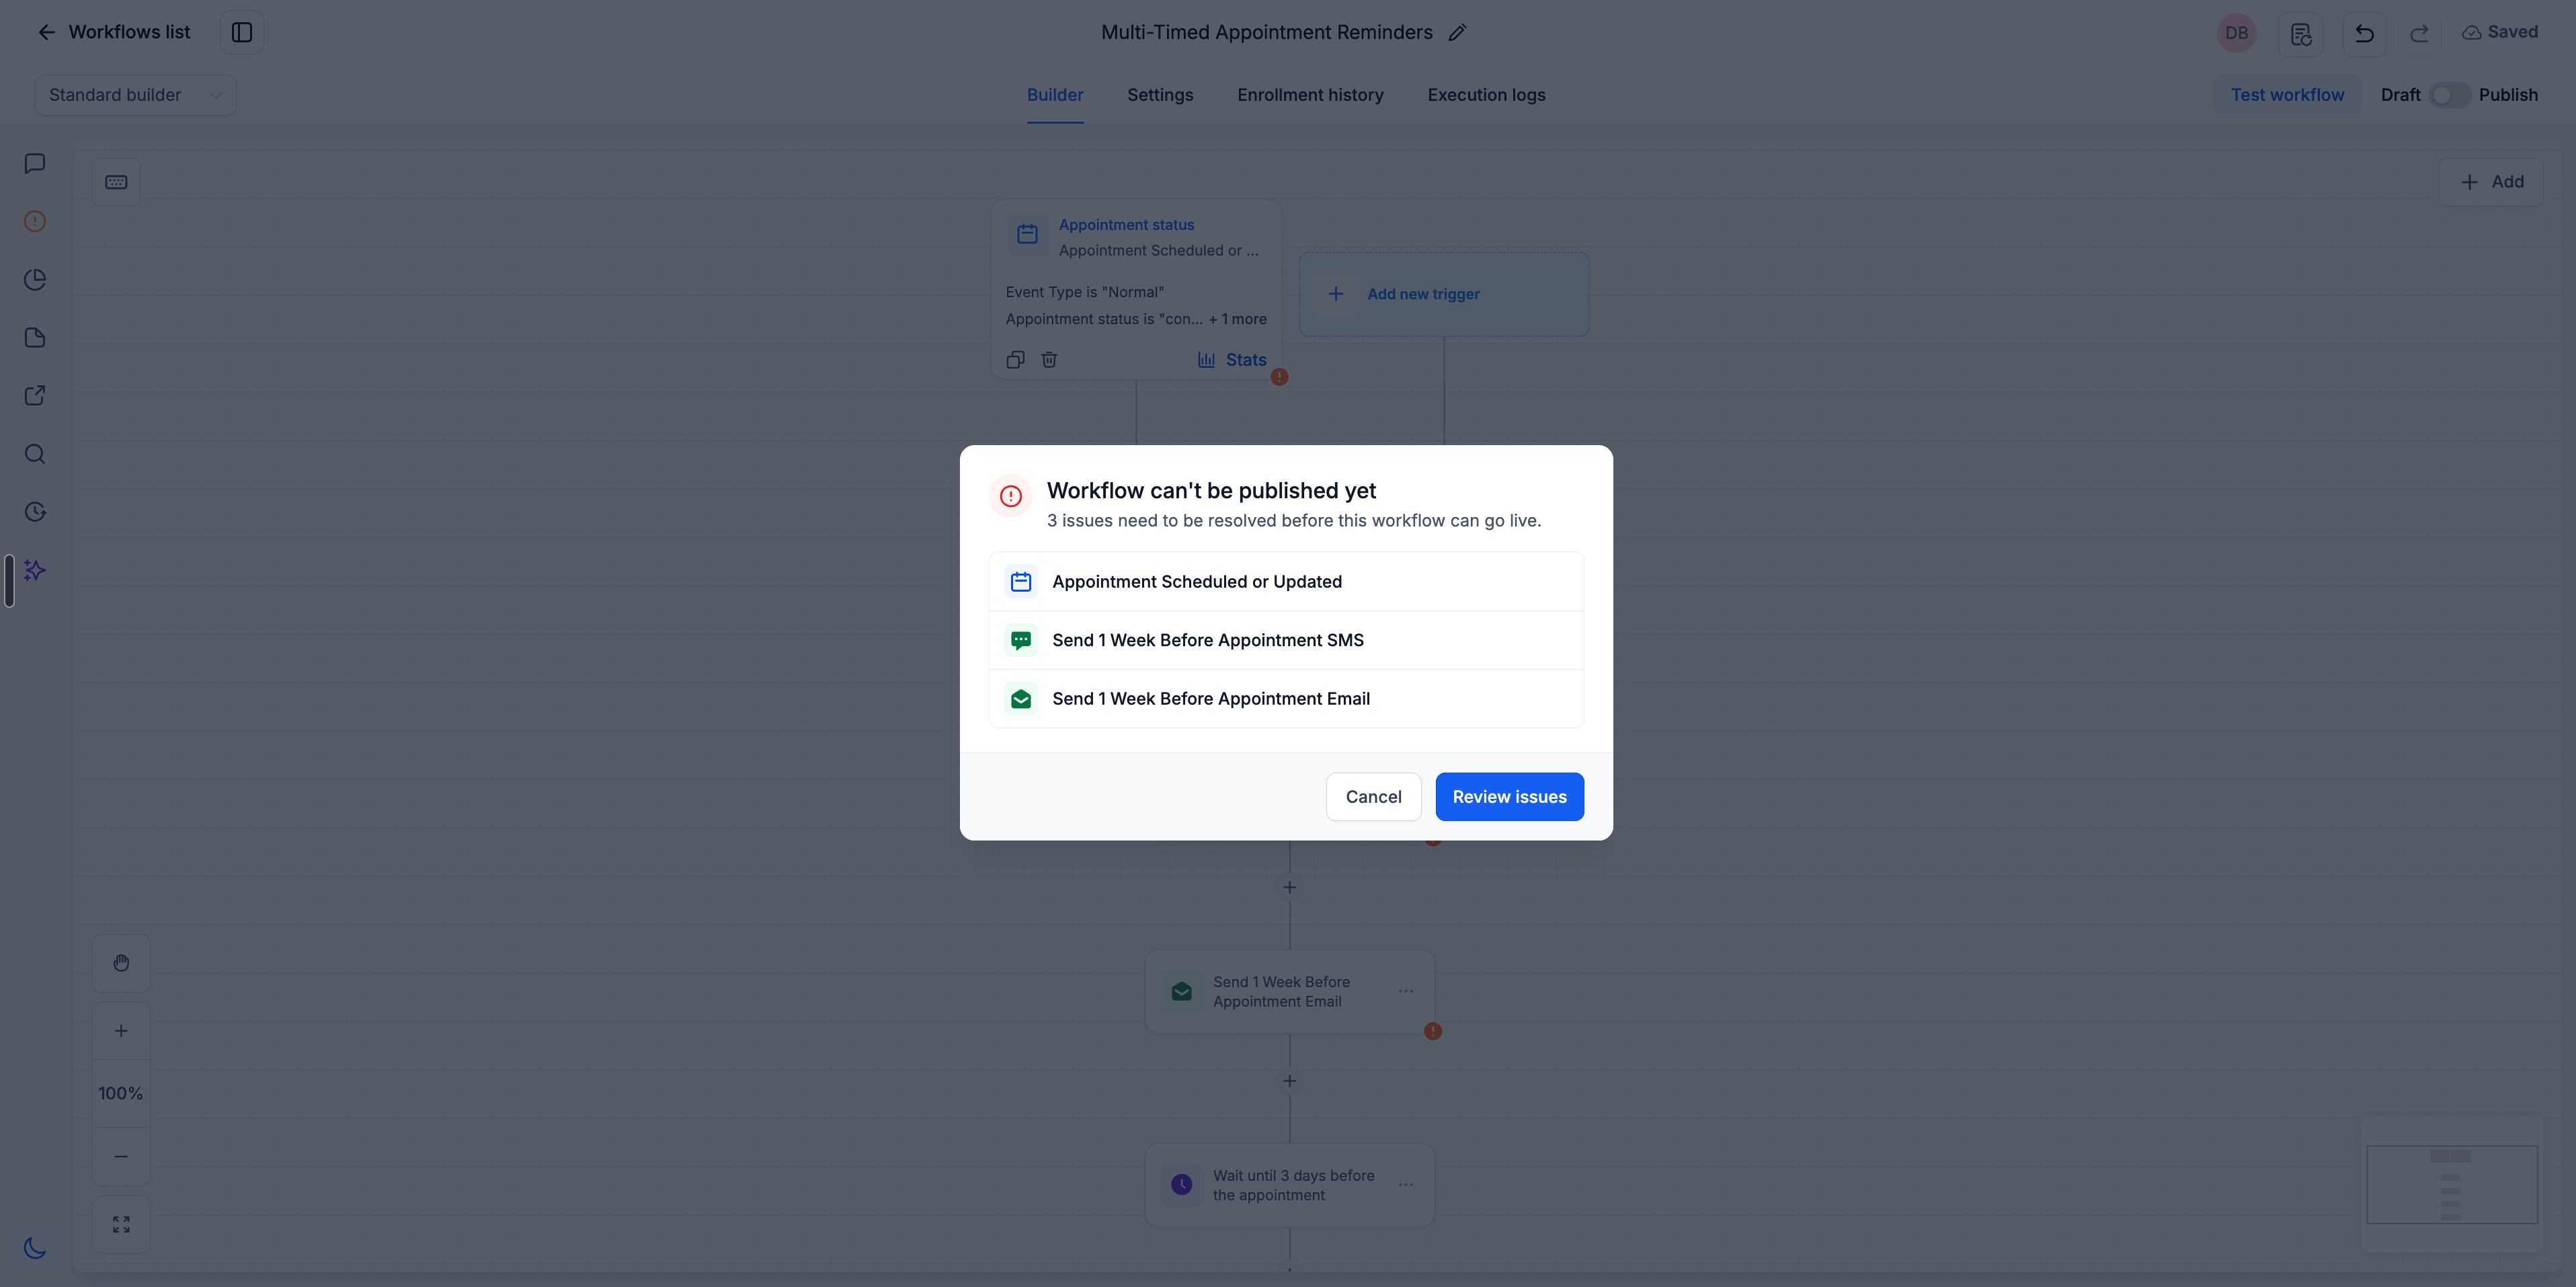
  • Hit Publish with unresolved errors and you get a modal listing every one of them.

  • Safer workflows for your customers, safer infra for all of us.

Screenshot 2026-09-11 at 5

How to Use

  1. Click Publish on your workflow.

  2. If errors exist, a modal lists the unresolved issues.

  3. Click Review Issues to open the Resolve Errors sidebar.

  4. For each error, choose Open Step to jump straight to that action or trigger, or take AI's help to resolve the error.

  5. Resolve everything, then publish.

Why It Matters

This sits on top of a full year of validation coverage built across triggers and actions. Users no longer guess what is misconfigured. The canvas tells them, the sidebar fixes it, and the publish gate makes sure only working workflows go live.

NewAutomations

Earlier updates